Lighting plays a crucial role in setting the mood and ambiance of a home. Whether you want to create a cozy reading nook, enhance your outdoor space, or add a touch of elegance to your interiors, DIY lighting projects offer a budget-friendly and creative way to achieve the perfect glow. From repurposing household items to crafting unique fixtures, these ideas will help you personalize your lighting while adding warmth and charm to any room.
In this blog post, we’ll explore some of the best DIY lighting ideas that are easy to implement, stylish, and functional. Get ready to brighten up your home with these creative solutions!
Mason Jar Lanterns for Rustic Charm
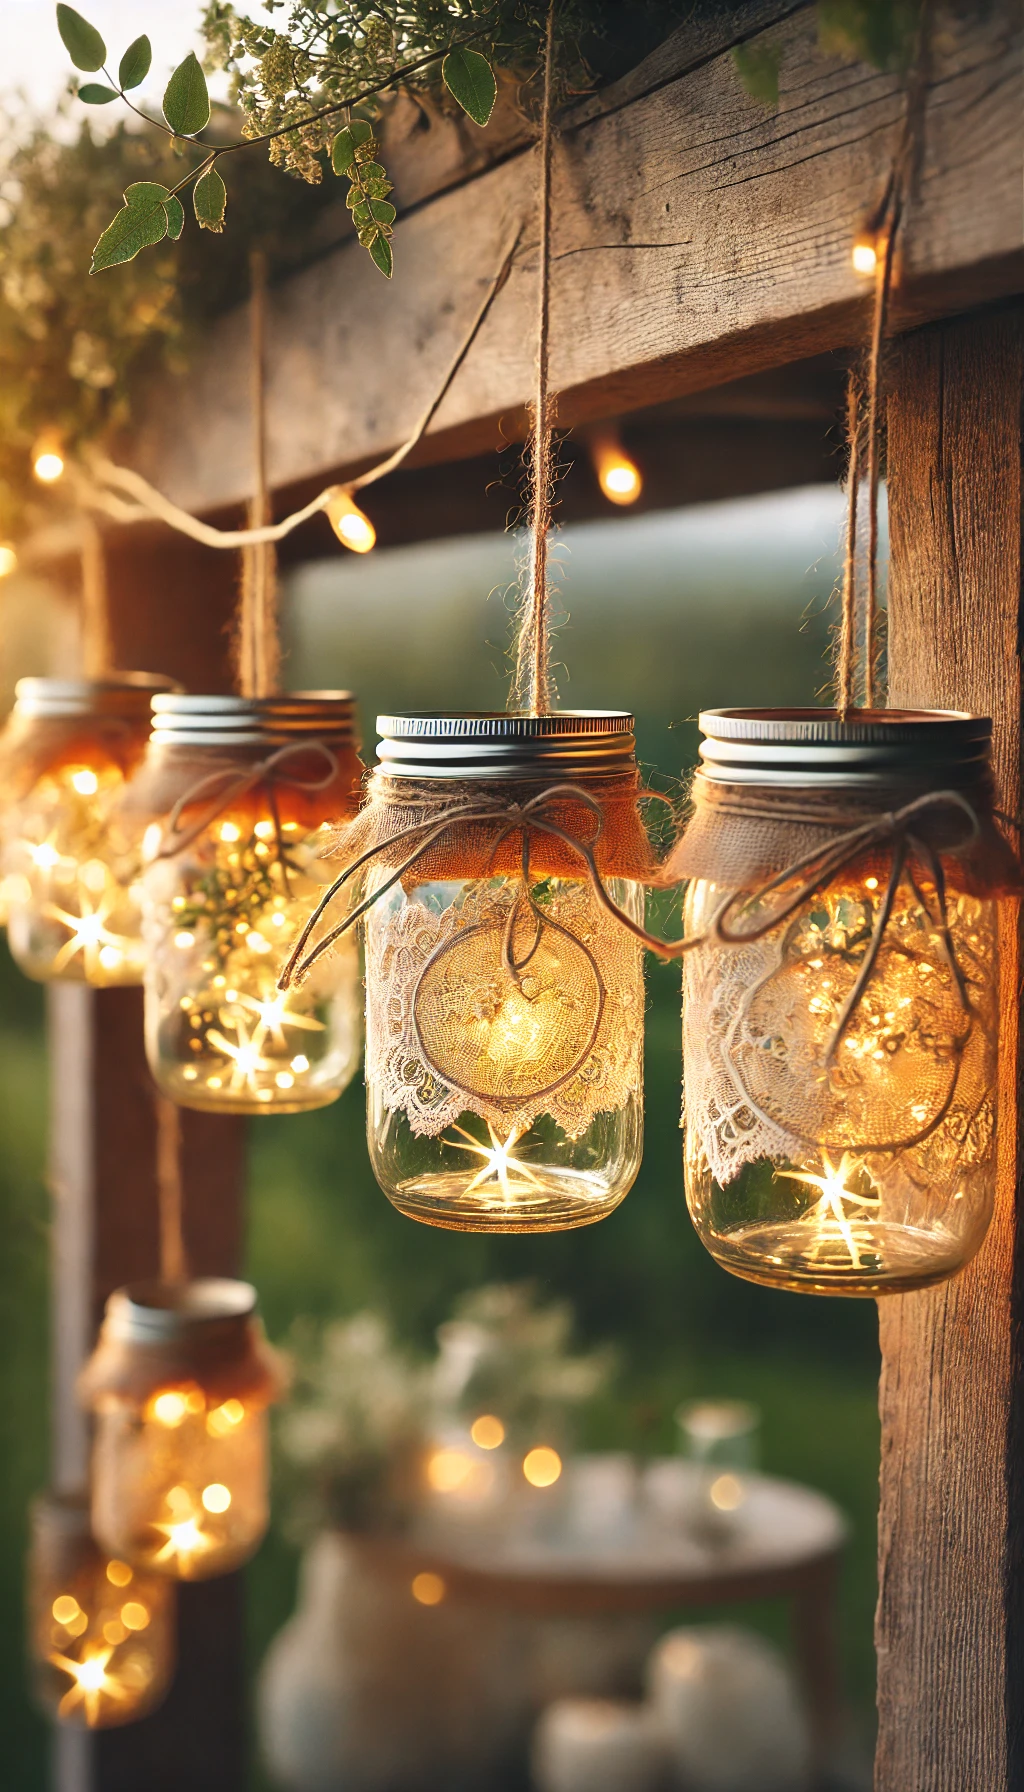
Mason jar lanterns are one of the simplest yet most beautiful DIY lighting ideas, perfect for adding a rustic and cozy charm to your home. Their versatility allows them to be used both indoors and outdoors, whether as table centerpieces, hanging lanterns, or even wall sconces. With just a few materials, you can transform ordinary mason jars into stunning light sources that enhance the ambiance of any space.
Materials Needed:
- Mason jars (clear or tinted)
- LED fairy lights or battery-operated tea lights
- Twine, jute rope, or wire for hanging
- Frosted glass spray or glass paint (optional)
- Decorative elements like dried flowers, lace, or burlap
Step-by-Step Guide to Creating Mason Jar Lanterns:
-
Choose Your Light Source:
- For a soft, twinkling effect, use LED fairy lights inside the jar. Battery-operated string lights work best since they don’t require plugging in.
- If you prefer a warm candle-like glow, opt for flameless LED tea lights. This is a safer option, especially for outdoor settings or homes with children and pets.
-
Decorate the Jar (Optional):
- Apply frosted glass spray for a softer, diffused glow.
- Use glass paint to create stained-glass effects for a colorful display.
- Wrap the jar with lace, burlap, or twine for a farmhouse-style touch.
-
Secure the Hanging Mechanism:
- Wrap wire around the rim of the mason jar and create a loop for hanging.
- Alternatively, tie twine or jute rope around the neck of the jar and leave extra length for hanging.
-
Assemble and Display:
- Place the chosen light source inside the jar and secure the lid if needed.
- Hang the lanterns from tree branches, ceiling hooks, or along a garden fence to create a magical outdoor atmosphere.
- If using them as tabletop lanterns, arrange them in clusters of varying heights for an aesthetically pleasing effect.
Best Uses for Mason Jar Lanterns:
- Patio and Garden Decor: Hang mason jar lanterns along your outdoor seating area for an enchanting evening glow.
- Bedroom Nightlights: Place them on bedside tables or bookshelves for a cozy, calming ambiance.
- Dining Table Centerpieces: Arrange multiple jars with candles or fairy lights for an elegant tablescape.
- Wedding or Event Decor: Use mason jar lanterns as part of a rustic-themed event to create a romantic atmosphere.
Bonus Tip:
For a seasonal twist, fill the jars with pinecones and fairy lights in winter, or with sand and seashells in summer. You can also swap out the lights for scented candles to create both a lighting and aromatherapy experience.
By repurposing mason jars, you’re not only adding a stylish lighting element to your home but also embracing sustainable and budget-friendly decor. Try out this easy DIY project and let your creativity shine!
DIY Pendant Lights from Recycled Materials
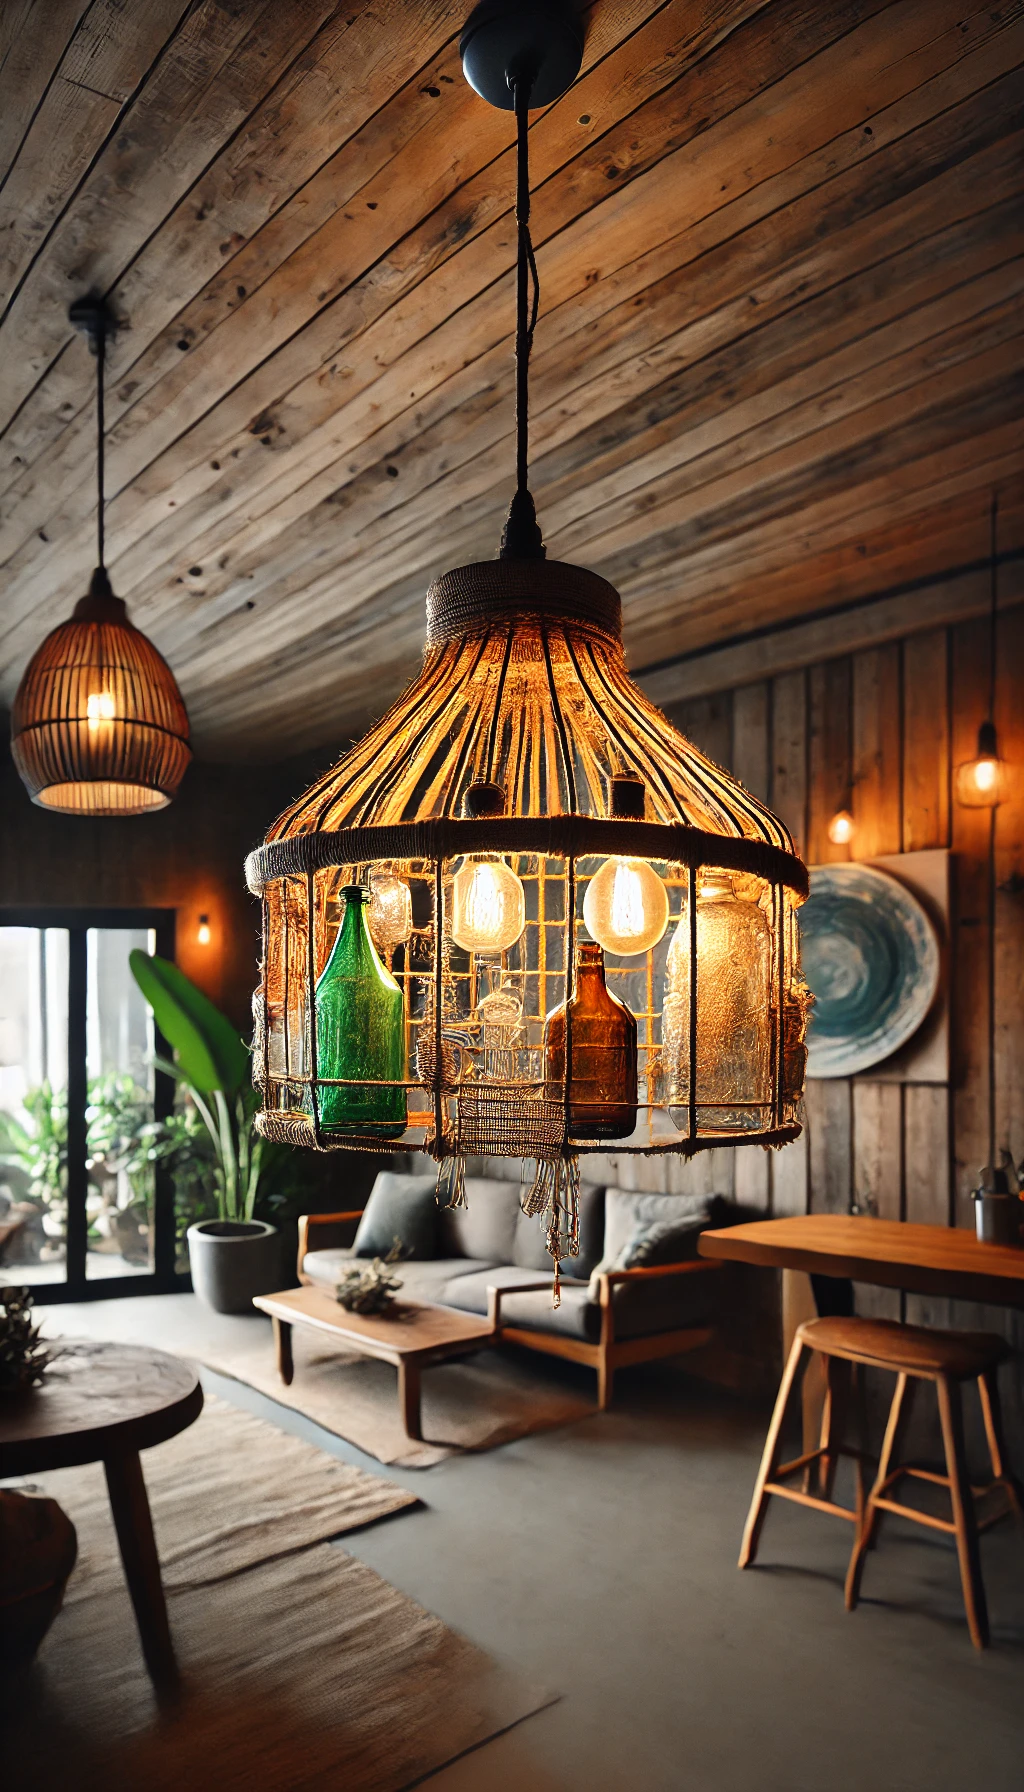
Creating pendant lights from recycled materials is a creative and eco-friendly way to enhance your home decor. Not only does it save money, but it also allows you to experiment with unique shapes, colors, and textures. From tin cans to glass bottles, almost any unused item can be transformed into a stunning hanging light fixture.
Materials You Can Use:
- Tin Cans – Such as coffee cans, soup cans, or food containers. With a little creativity, they can be turned into stylish industrial-style pendant lights.
- Woven Baskets or Rattan Shades – Perfect for a boho-chic and natural ambiance, allowing light to filter through the weaving beautifully.
- Glass Bottles or Mason Jars – Great for a sleek, minimalist design. You can use wine bottles, soda bottles, or mason jars.
- Metal Colanders or Strainers – The perforated holes create a unique lighting effect, casting beautiful patterns when the light is switched on.
- Old Drum Lids or Baking Pans – These add a rustic and industrial touch to your home decor.
How to Make DIY Pendant Lights from Recycled Materials:
-
Choose a Material That Matches Your Decor Theme
- For an industrial look, use tin cans or metal lids.
- For a rustic or bohemian vibe, choose woven baskets or glass bottles.
- For a sleek, modern feel, opt for painted glass bottles or solid-colored lampshades.
-
Prepare and Clean the Material
- Wash and dry the bottles or cans thoroughly.
- If using glass bottles, soak them in warm soapy water to remove labels.
- If using tin cans, ensure there are no sharp edges that could cause injuries.
-
Drill a Hole for the Wiring and Light Fixture
- Use a drill or cutting tool to make a hole large enough for the light socket and wiring.
- If using glass bottles, make sure to use a glass-cutting drill bit to prevent cracking.
-
Paint or Decorate the Fixture (Optional)
- Spray metallic or matte paint for a modern, sophisticated look.
- Use a distressing technique for a vintage appearance.
- Add accents like twine, lace, or transparent stickers for extra decorative effects.
-
Install the Light Fixture
- Insert the light socket and wiring through the drilled hole.
- Ensure the wiring is safely secured.
- Use energy-efficient LED bulbs to reduce heat and save electricity.
-
Hang and Adjust the Height
- Adjust the cord length to fit the desired height for your space.
- Use hooks or pipes to securely attach the light to the ceiling.
- If using multiple pendant lights, arrange them at different heights for a visually appealing design.
Best Uses for DIY Pendant Lights from Recycled Materials:
- Above the Dining Table – Adds an artistic touch to your dining area.
- In the Kitchen – Use old strainers or coffee cans to create stylish and functional lighting.
- In the Bedroom – Glass bottle pendant lights with warm white bulbs create a cozy and calming ambiance.
- On the Patio or Garden – Use weather-resistant materials like tin cans or woven shades for outdoor decor.
Bonus Tips:
- Choose vintage Edison-style LED bulbs for a warm and classic aesthetic.
- Use colored or braided cords to add an extra design element.
- Apply heat-resistant paint if you plan to paint the inside of the lamp for durability.
By creating your own pendant lights from recycled materials, you’re not only saving money but also contributing to sustainability while designing a home with character and unique charm.
Fairy Light Canopy for a Cozy Atmosphere

Creating a fairy light canopy is one of the easiest yet most enchanting ways to transform your space into a warm and magical retreat. Whether you’re decorating a bedroom, living room, or outdoor patio, fairy lights provide a soft, ambient glow that instantly enhances the mood. The best part? They are affordable, energy-efficient (especially LED variants), and incredibly versatile.
Why Choose a Fairy Light Canopy?
- Creates a Dreamy, Cozy Vibe – Perfect for relaxing or setting a romantic mood.
- Easy to Install – No need for complicated electrical work or expensive fixtures.
- Customizable – You can adjust the arrangement, color, and type of fairy lights to suit your aesthetic.
- Suitable for Any Space – Ideal for bedrooms, living rooms, patios, or even special occasions like weddings or parties.
Materials You’ll Need
- Fairy Lights (warm white for a cozy look, colored for a playful vibe, or cool white for a modern aesthetic)
- Hooks, Curtain Rods, or Command Strips (for attaching the lights)
- Sheer Curtains or Canopy Fabric (optional, for a softer, diffused effect)
- Extension Cord or Battery Pack (depending on your setup)
- Zip Ties or Clear Tape (for securing the lights in place)
Creative Ways to Set Up a Fairy Light Canopy
1. Bed Canopy for a Dreamy Bedroom
Best for: Bedrooms, cozy nooks
- Drape sheer curtains from a ceiling-mounted curtain rod or canopy frame.
- Weave warm white fairy lights through the fabric for a soft, glowing effect.
- Let the lights hang loosely around the bed or frame them neatly for a clean, elegant look.
- Use twinkle-effect fairy lights for a subtle sparkling effect that mimics a starlit night.
Tip: If you don’t have a canopy frame, attach the lights directly to the ceiling above the bed using adhesive hooks.
2. Ceiling Starry Night Effect
Best for: Living rooms, bedrooms, patios, event spaces
- Arrange fairy lights in a crisscross pattern across the ceiling to mimic a starry sky.
- Use fishing wire or clear tape to keep the lights suspended without visible cords.
- For a twinkling night-sky effect, use fairy lights with built-in blinking modes.
- If decorating a kids’ room, pair the lights with glow-in-the-dark star stickers for a magical nightlight effect.
Tip: Choose battery-operated fairy lights if you don’t have an accessible power outlet on the ceiling.
3. Curtain Backdrop for a Cozy Living Space
Best for: Living rooms, dorm rooms, home offices
- Hang a set of sheer white curtains in front of a wall.
- Drape fairy lights behind the curtains to create a soft, glowing backdrop.
- This setup works beautifully behind a sofa, bed, or workspace, adding warmth to the room.
- Use cool white lights for a modern touch or warm white lights for a softer, inviting glow.
Tip: This is an amazing setup for video calls or social media backgrounds!
4. Outdoor Canopy for a Magical Garden or Patio
Best for: Patios, balconies, garden spaces, pergolas
- Attach fairy lights to an existing pergola, gazebo, or umbrella frame.
- Let them drape downwards like a curtain or wrap them around poles for a whimsical look.
- Combine fairy lights with vines, flowers, or paper lanterns for a dreamy garden aesthetic.
- Use weatherproof, solar-powered fairy lights for an energy-efficient and long-lasting solution.
Tip: For a romantic dinner setup, pair fairy lights with a small outdoor rug, a rustic table, and candles.
5. Canopy Over a Reading Nook or Workspace
Best for: Small cozy corners, home offices, reading areas
- String fairy lights around the edges of a small canopy or tent-style nook.
- Use warm-toned lights to create a soft glow that won’t strain your eyes.
- If you don’t have a tent or nook, attach fairy lights to a bookshelf or workspace wall.
- Pair with floating bookshelves, a comfortable chair, and soft throw blankets for the ultimate cozy atmosphere.
Tip: Use dimmable fairy lights to adjust brightness for different moods (relaxation vs. productivity).
Extra Styling Tips for a Stunning Fairy Light Canopy
Layer lights with sheer curtains to diffuse brightness and create a soft, magical glow.
Mix different types of fairy lights (e.g., globe-style, micro-LEDs, icicle-shaped) for a unique lighting effect.
Choose remote-controlled fairy lights for easy brightness and mode adjustments.
Use color-changing fairy lights for a dynamic, mood-changing effect.
Add mirrors near the lights to enhance the brightness and make the space feel bigger.
A fairy light canopy is a simple yet transformative DIY decor idea that can instantly elevate any space. Whether you’re looking for a cozy bedroom setup, a dreamy outdoor ambiance, or an enchanting reading nook, these delicate lights can create the perfect mood. Plus, with so many creative ways to style them, you can always customize your setup to match your personality and home aesthetic.
Read too: 10 Budget-Friendly DIY Living Room Decor Ideas to Transform Your Space
Rope-Wrapped Lamp for a Coastal Vibe ️
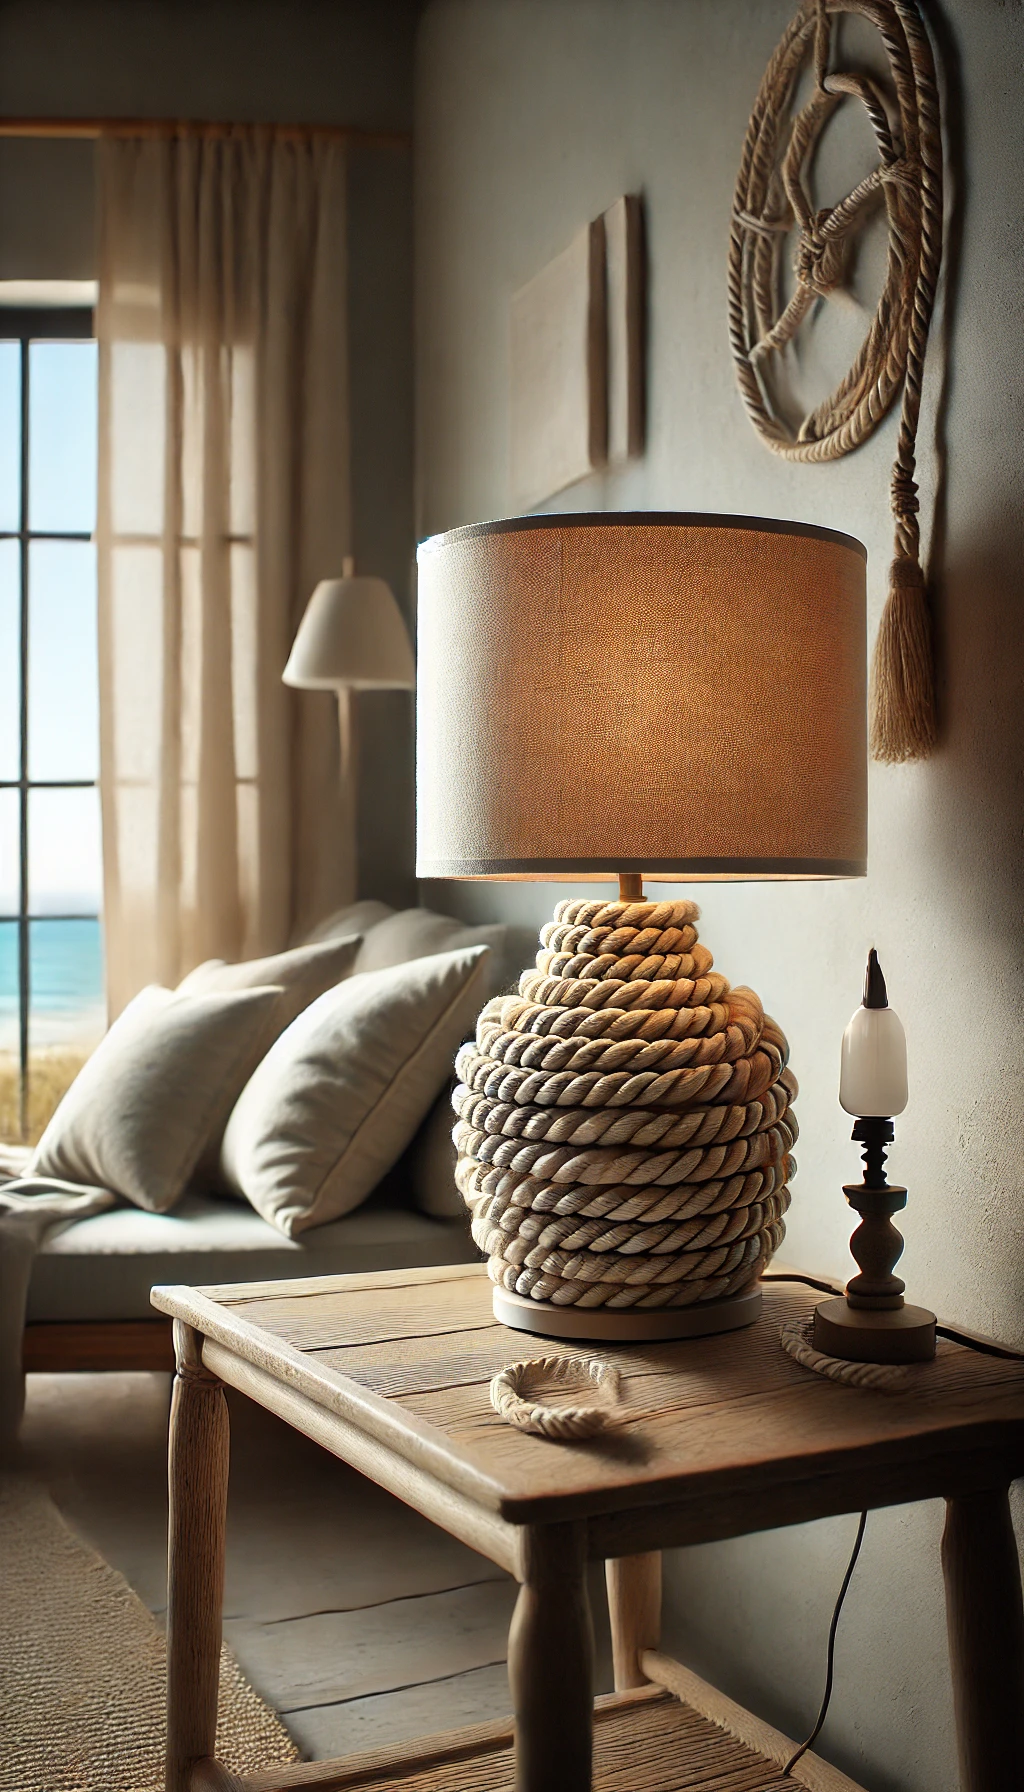
A rope-wrapped lamp is a fantastic way to add a coastal, nautical, or rustic charm to your home decor. Inspired by beachside cottages and maritime aesthetics, this DIY lighting project brings warmth and texture while being budget-friendly and easy to create. The best part? You can upcycle an old lamp or lamp base and turn it into a stylish decor piece that looks like it came straight from a high-end coastal home store.
Why Choose a Rope-Wrapped Lamp?
Budget-Friendly & Sustainable – Uses inexpensive materials and allows you to repurpose old lamps.
Coastal & Rustic Aesthetic – Perfect for beach-themed, farmhouse, or boho decor.
Easy DIY Project – No special skills required, just patience and creativity!
Customizable – Adjust the thickness, type, and color of the rope to match your decor style.
Materials You’ll Need
- An old lamp base (or a new simple one)
- Natural jute, sisal, or cotton rope (½-inch to 1-inch thickness works best)
- Hot glue gun and glue sticks
- Scissors or a utility knife
- Painter’s tape (optional, for cleaner edges)
- Clear sealant spray (optional, for durability)
Tip: If you want a lighter, boho look, opt for white or off-white cotton rope instead of brown jute.
Step-by-Step Guide to Creating a Rope-Wrapped Lamp
1. Prepare Your Lamp Base
- Clean the surface of your lamp to remove dust or oils.
- If your lamp has an uneven surface, consider sanding it lightly to help the glue adhere better.
- Protect the lightbulb socket and wiring by covering them with painter’s tape or plastic wrap.
2. Start Wrapping the Rope
- Apply a small line of hot glue at the base of the lamp.
- Press the end of the rope onto the glue and hold for a few seconds until secure.
- Continue wrapping the rope tightly around the lamp, adding glue every few inches.
- If you want a more polished look, ensure each row of rope is snug and aligned properly.
Tip: If your lamp base has curves, press the rope firmly into the shape to avoid gaps.
3. Secure the Rope at the Top
- Once you reach the top of the lamp, trim the excess rope neatly with scissors.
- Secure the final end with a generous amount of glue and press firmly.
- If you want a seamless finish, tuck the rope end under the last wrapped row.
Optional: Spray the entire rope-wrapped section with clear sealant to protect it from dust and fraying.
4. Style & Customize
- Pair the lamp with a neutral linen lampshade for a clean, natural look.
- For a beach-inspired touch, glue small seashells, driftwood pieces, or starfish onto the rope.
- If you love the farmhouse style, add a strip of burlap ribbon around the lampshade.
- Want a pop of color? Lightly dry-brush white or blue paint over the rope for a weathered, coastal effect.
Where to Use a Rope-Wrapped Lamp
Living Room: Place it on an end table to create a warm, inviting atmosphere.
Bedroom: Use it on a nightstand for a cozy, beachy retreat.
Sunroom or Patio: Perfect for enhancing natural light in airy spaces.
Bathroom: Adds a spa-like coastal touch when placed on a vanity or shelf.
Tip: Pair your lamp with other nautical-themed decor, like woven baskets, driftwood accents, and light blue or white elements for a full coastal look!
A rope-wrapped lamp is a simple yet impactful DIY project that adds charm and character to any room. Whether you want to refresh an old lamp or create a statement piece from scratch, this easy tutorial will help you achieve a stylish coastal look in no time. Plus, with customizable options, you can make it match your unique home aesthetic.
So, grab some rope, fire up your hot glue gun, and let’s bring a touch of the seaside into your home!
LED Strip Lighting for Modern Ambiance
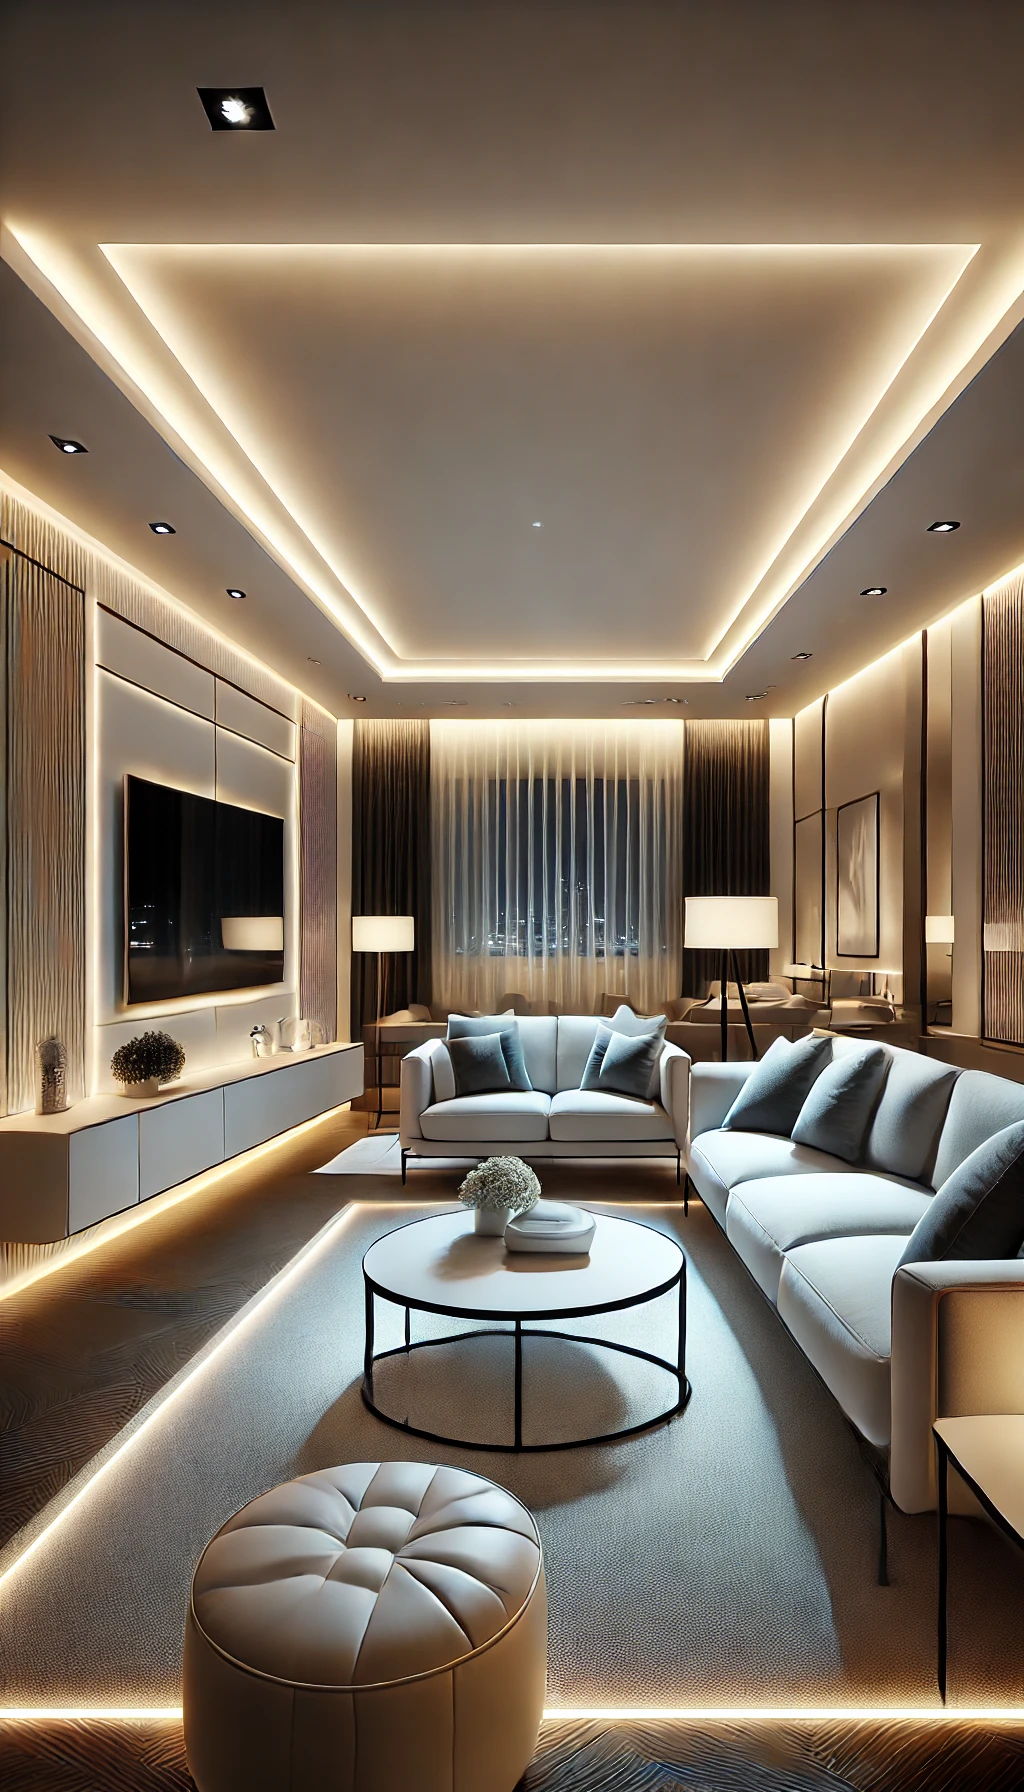
LED strip lighting is one of the most versatile, energy-efficient, and stylish ways to add ambiance to your home. Whether you’re looking to create a cozy atmosphere in your bedroom, add a futuristic touch to your workspace, or enhance the aesthetics of your living room, LED strip lights offer an easy, budget-friendly solution. They come in a variety of colors, brightness levels, and smart control options, making them perfect for any DIY home decor project.
Benefits of LED Strip Lights
✔ Energy-Efficient – Uses less power than traditional lighting.
✔ Customizable – Available in different colors, brightness levels, and lengths.
✔ Easy Installation – Self-adhesive backing makes application simple.
✔ Smart Home Compatibility – Many options are compatible with Alexa, Google Home, or remote control.
✔ Safe & Durable – Produces little heat and lasts for thousands of hours.
Best Ways to Use LED Strip Lighting in Your Home
1. Under-Cabinet Lighting for a Sleek Kitchen Look
Adding LED strip lights under kitchen cabinets is a simple way to create a modern, well-lit workspace while enhancing the overall aesthetics. These lights provide task lighting for cooking and meal prep while adding a soft glow that makes your kitchen feel high-end.
✅ How to Install:
- Measure the length of your cabinets.
- Choose warm white or cool white LED strips for a soft, natural look.
- Peel off the adhesive backing and stick the strips along the bottom edge of the cabinets.
- Connect them to a power source and enjoy the sleek ambiance!
Bonus Tip: Use motion sensor LED strips under cabinets for hands-free lighting at night!
2. Ambient Bedroom Lighting for a Cozy & Relaxing Feel
LED strip lighting in the bedroom can transform your space into a cozy retreat. Whether you install them behind your headboard, along the ceiling, or under the bed, they provide a soft, warm glow that’s perfect for unwinding at night.
✅ Ideas for Bedroom LED Lighting:
- Install warm white or dimmable LED strips behind the headboard for a hotel-like ambiance.
- Use color-changing LED strips to match different moods and aesthetics.
- Place strips under the bed for a floating effect that adds a touch of elegance.
Smart Feature: Sync your LED lights with music or use a remote control to adjust colors!
3. Gaming & Home Office Setup with RGB LED Lights
For gamers and professionals, LED strip lights can enhance the look of your desk, monitor, or gaming setup by adding a cool, futuristic glow. RGB LED strips allow you to customize colors and even create dynamic lighting effects.
✅ Installation Tips:
- Place LED strips behind your desk or monitor to reduce eye strain.
- Use smart app-controlled RGB lights for interactive lighting that changes based on your screen.
- Adjust brightness levels to create the perfect gaming or working environment.
Pro Tip: Use sound-reactive LED strips that sync with game audio or music for an immersive experience!
4. Living Room Accent Lighting for a Stylish Touch
LED strips can be used in living rooms to highlight architectural features, bookshelves, or TV areas. Soft, indirect lighting adds depth and sophistication to any space.
✅ Where to Use LED Strips in the Living Room:
- Behind the TV unit for a cinematic effect.
- Along floating shelves to accentuate decor pieces.
- Under the sofa or coffee table for a futuristic touch.
- Around the ceiling edges for soft ambient lighting.
Pro Tip: Install warm white LED strips for a cozy atmosphere or go for color-changing lights for a more playful effect!
5. Bathroom LED Lighting for a Spa-Like Vibe
Turn your bathroom into a relaxing spa by adding LED strip lights under vanities, along mirrors, or around bathtubs. Soft, indirect lighting creates a luxurious feel while providing practical illumination.
✅ Best Spots for LED Strips in the Bathroom:
- Under the vanity for a floating effect.
- Around the mirror for an elegant, well-lit space.
- Along the bathtub base for a soothing ambiance.
Safety Tip: Choose waterproof LED strip lights (IP65-rated) to ensure durability in humid environments!
How to Install LED Strip Lights Like a Pro
Step 1: Choose the Right LED Strips
There are different types of LED strips based on brightness, color, and functionality. Some common types include:
- Warm White (2700K – 3000K): Creates a cozy, welcoming atmosphere.
- Cool White (5000K – 6000K): Best for kitchens, offices, and modern spaces.
- RGB Color-Changing: Great for gaming setups, bedrooms, and accent walls.
- Smart LED Strips: Works with WiFi, remote control, or smart home devices.
Step 2: Measure & Cut the LED Strip Lights
- Measure the area where you want to install the lights.
- Use scissors to cut the strips at the designated cut points.
Tip: Some LED strips can’t be cut, so check before purchasing!
Step 3: Install & Secure the LED Strips
- Peel off the adhesive backing and stick the LED strips onto a clean, dry surface.
- If needed, use extra clips or mounting brackets for additional support.
- Connect the LED strips to the power supply and controller.
Tip: Use aluminum channels for a sleek, professional finish!
Step 4: Customize Your LED Lights
- Adjust the brightness and color using a remote, app, or smart assistant.
- Set up timers or schedules for automatic lighting changes.
- Experiment with different modes (flashing, fading, color transitions) for dynamic effects.
LED strip lighting is one of the best DIY home decor hacks for adding modern ambiance, functionality, and style. Whether you want a cozy bedroom, a high-tech gaming setup, or a luxurious bathroom, LED lights offer endless possibilities.
By choosing the right color temperature, placement, and control options, you can completely transform your space with minimal effort. So why not grab some LED strips and start creating your dream ambiance today?
DIY Paper Lanterns for a Soft Glow
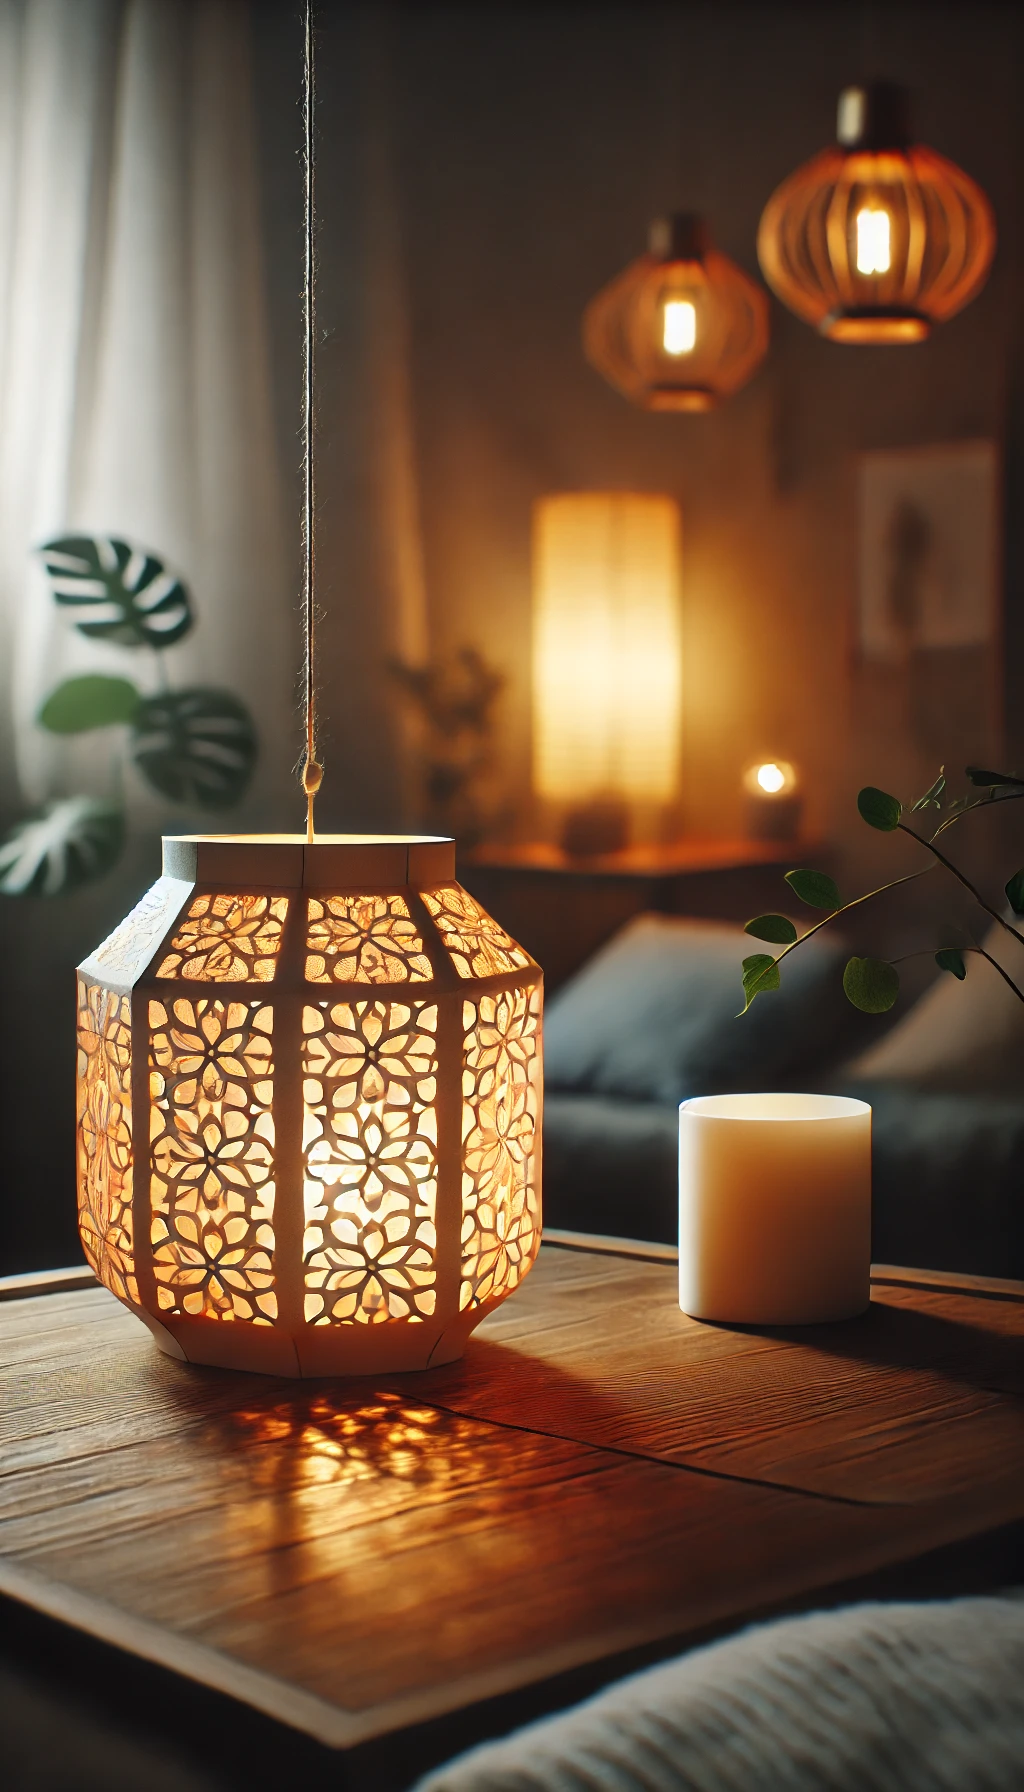
Paper lanterns are an affordable, elegant, and customizable way to add a soft glow to your home. Whether you’re decorating for a special event, enhancing your bedroom ambiance, or simply adding a touch of warmth to your living space, DIY paper lanterns are a fun and creative lighting solution. They are easy to make, require minimal materials, and can be personalized with different shapes, colors, and patterns to match your home decor.
Benefits of DIY Paper Lanterns
✔ Budget-Friendly – Made with inexpensive materials like paper, glue, and string lights.
✔ Customizable – Choose different shapes, colors, and patterns.
✔ Eco-Friendly – Use recycled or sustainable paper for an environmentally conscious choice.
✔ Soft, Ambient Lighting – Perfect for creating a cozy and relaxing atmosphere.
✔ Versatile – Ideal for bedrooms, patios, party decorations, or holiday setups.
How to Make DIY Paper Lanterns
Materials Needed:
- Colored or patterned paper (origami paper, rice paper, or cardstock)
- Scissors or a craft knife
- Glue or double-sided tape
- LED tea lights or fairy lights (battery-operated for safety)
- Hole puncher or string (for hanging lanterns)
- Wooden skewers or wire (for structured lantern designs)
Step 1: Choose Your Lantern Style
There are several styles of paper lanterns you can make depending on the ambiance you want to create:
- Classic Folded Paper Lanterns – A simple cylinder with cut-out slits to allow light to shine through.
- Origami-Inspired Lanterns – Intricate, folded designs like lotus flowers or geometric shapes.
- Balloon Paper Lanterns – Tissue paper layered over an inflated balloon, then hardened with glue.
- Hanging Star Lanterns – 3D cut-out shapes that cast beautiful light patterns on the walls.
- Luminaria (Bag Lanterns) – Paper bags with cut-out designs, perfect for table settings or pathways.
Step 2: Create the Lantern Shape
-
For a Classic Paper Lantern:
- Fold a piece of colored paper in half lengthwise.
- Cut slits along the folded edge, stopping about 1 inch from the other side.
- Open the paper and form it into a cylinder, securing the edges with glue or tape.
- Attach a handle using string or an extra strip of paper.
-
For an Origami-Inspired Lantern:
- Follow a simple origami pattern for a cube, star, or flower shape.
- Leave small openings or cut decorative holes for the light to shine through.
-
For a Balloon Paper Lantern:
- Blow up a balloon and cover it with layers of tissue paper soaked in glue.
- Let it dry completely before popping the balloon.
- Insert fairy lights inside for a beautiful glowing orb.
Step 3: Add Lighting & Decoration
- Insert LED tea lights or fairy lights inside the lantern.
- Use hole punches, stencils, or cut-out patterns to create unique lighting effects.
- Add paint, glitter, or pressed flowers to personalize your lanterns.
- Hang them with twine, ribbon, or a metal frame to create a floating effect.
Best Places to Use DIY Paper Lanterns
Outdoor Patio or Garden: Hang multiple lanterns from tree branches for a magical evening glow.
Bedroom Decor: Create a soft, dreamy ambiance by placing lanterns on nightstands or hanging them over the bed.
Party & Event Lighting: Use different colored lanterns for weddings, birthdays, or holiday celebrations.
Cozy Reading Nook: Place a small paper lantern near your reading corner for a warm and inviting atmosphere.
Safety Tips for Paper Lanterns
⚠ Always use LED tea lights or battery-operated lights to prevent fire hazards.
⚠ Avoid placing paper lanterns near heat sources like fireplaces or open flames.
⚠ Ensure hanging lanterns are securely attached to prevent falling accidents.
DIY paper lanterns are an easy and creative way to bring warmth and ambiance to your home. With just a few materials, you can make stunning, budget-friendly decor that adds a personal touch to any space. Whether you prefer a minimalist design, an intricate origami look, or a rustic paper bag lantern, there are endless possibilities to explore.
So grab some paper, turn on your favorite music, and start crafting your own glowing masterpiece!
Conclusion
DIY lighting ideas are a fantastic way to personalize your home while adding warmth and ambiance. Whether you’re using repurposed materials, soft fairy lights, or modern LED strips, these ideas offer creative ways to brighten up your space on a budget.
Which DIY lighting project will you try first? Let us know in the comments, and don’t forget to share your creations with us on social media!