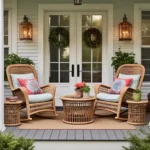
I still remember the first time I walked into a minimalist home. It was a friend’s apartment in Copenhagen—bright, open, and effortlessly calming. As a home decor enthusiast and DIYer, I was captivated. There were no flashy centerpieces or cluttered shelves—just thoughtful design, clean lines, and warm, natural textures. That visit changed how I saw home decor. I realized that creating a cozy, inviting home doesn’t mean filling every corner—it means curating each space with intention.

Since then, I’ve embraced minimalist architecture in my own DIY projects, blending simplicity with warmth. And today, I want to share that journey with you. Whether you live in a compact apartment or a spacious home, these cozy DIY home decor ideas—rooted in minimalist principles—will help you craft a space that feels both stylish and soothing.
This article is packed with cozy DIY home decor ideas inspired by minimalist architecture. Whether you’re decorating a small apartment or refreshing your favorite corner, these beginner-friendly projects will help you blend warmth, elegance, and purpose. Let’s dive into 10 stunning ideas that prove you don’t need excess to express your style.
Read too: Why Japandi Sofas Are the Cozy Minimalist Trend You Need Now
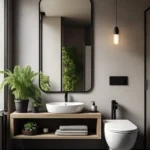
The Core Principles of Minimalist Architecture in Home Decor
Minimalist architecture isn’t just about having less—it’s about making more of what you do have. It revolves around the idea that simplicity, when done thoughtfully, leads to a deeper sense of comfort and beauty. When applied to home decor, minimalist principles help you strip away the nonessential and focus on what truly adds value to your living space. Let’s break down the foundational elements:
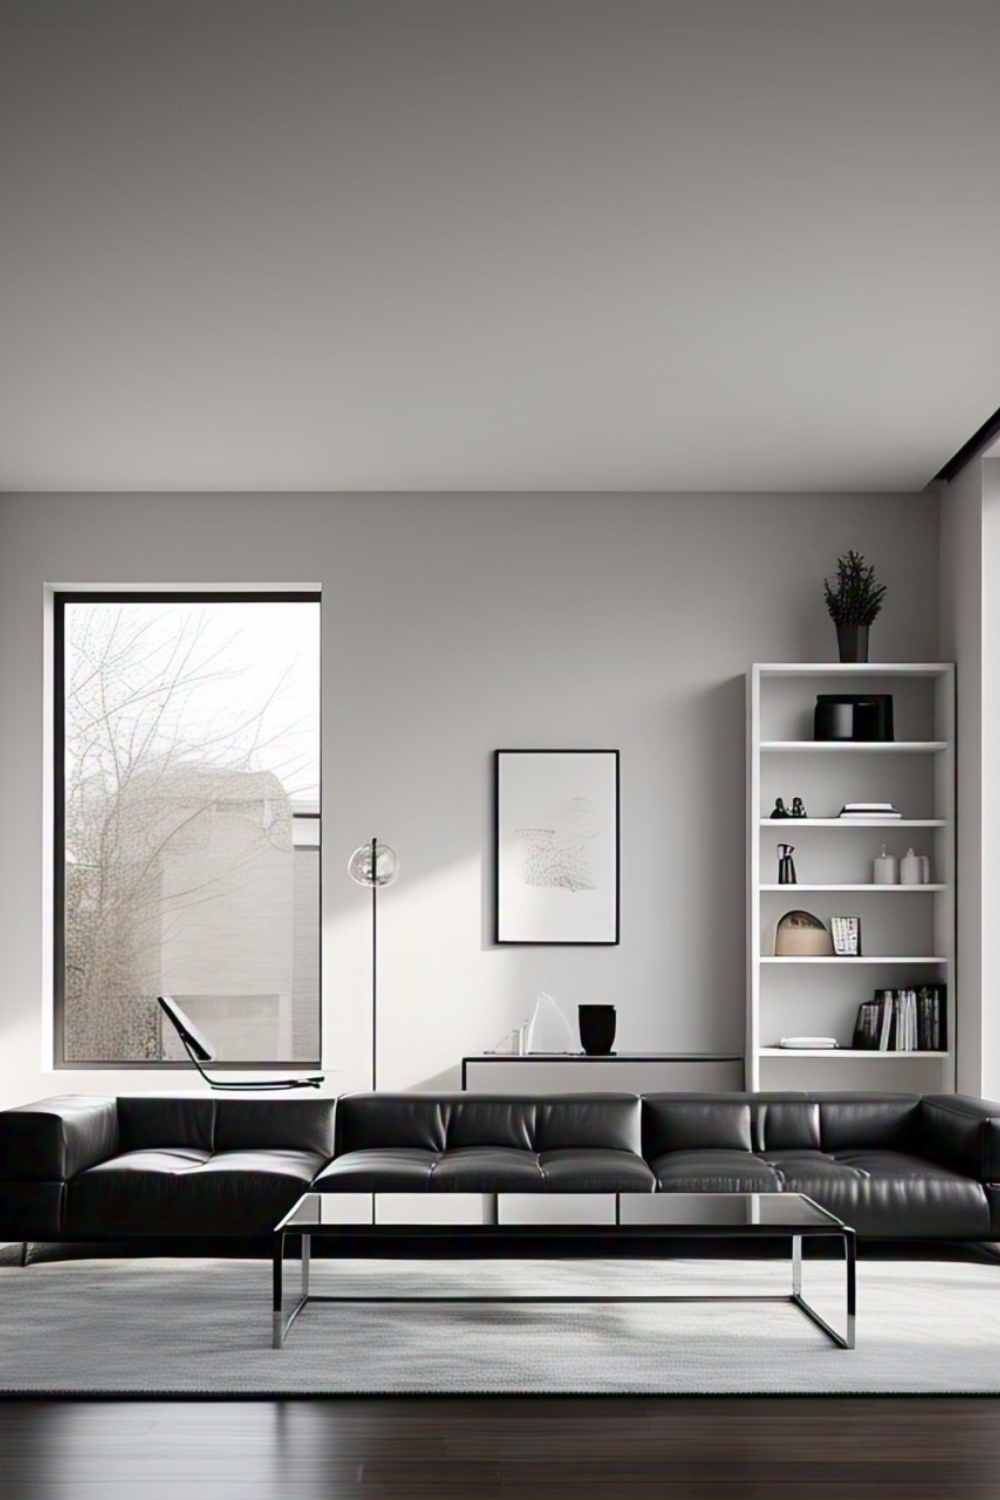
- Clean Lines: Minimalist spaces prioritize form and geometry. Furniture and decor often feature straight or subtly curved lines that create a sense of order and balance. Think sleek tables, rectangular shelves, and neatly aligned wall art. Clean lines visually declutter a room and create a calming rhythm.
- Neutral Tones: A key to minimalist style is the use of a restrained color palette. Whites, soft greys, muted earth tones, and shades of beige dominate the space, providing a serene and harmonious backdrop. These colors not only open up small spaces but also allow natural light to reflect, enhancing the overall brightness and warmth.
- Functional Design: In minimalist architecture, everything has a purpose. Furniture pieces are selected not only for their aesthetic but also for their utility. Multi-functional items like storage benches or foldable desks reflect this principle, as do decor items that serve dual purposes, such as a wall mirror that expands visual space.
- Open Space: Negative space—or empty space—is as important as the furniture itself. Rather than crowding a room with decor, minimalist design embraces open areas to give the eyes and the mind a place to rest. This sense of spaciousness makes even the smallest room feel more breathable and inviting.
- Natural Materials and Light: Minimalism celebrates authenticity. Unfinished wood, stone, linen, and other natural materials bring texture and depth without overpowering the room. Large windows, sheer curtains, and strategically placed mirrors are used to maximize daylight, creating a soft and welcoming environment.
When you apply these core ideas to your DIY home decor, you’re not just crafting furniture or wall art—you’re building intentional spaces that support your lifestyle and well-being.
Project 1: DIY Floating Shelves with Hidden Brackets
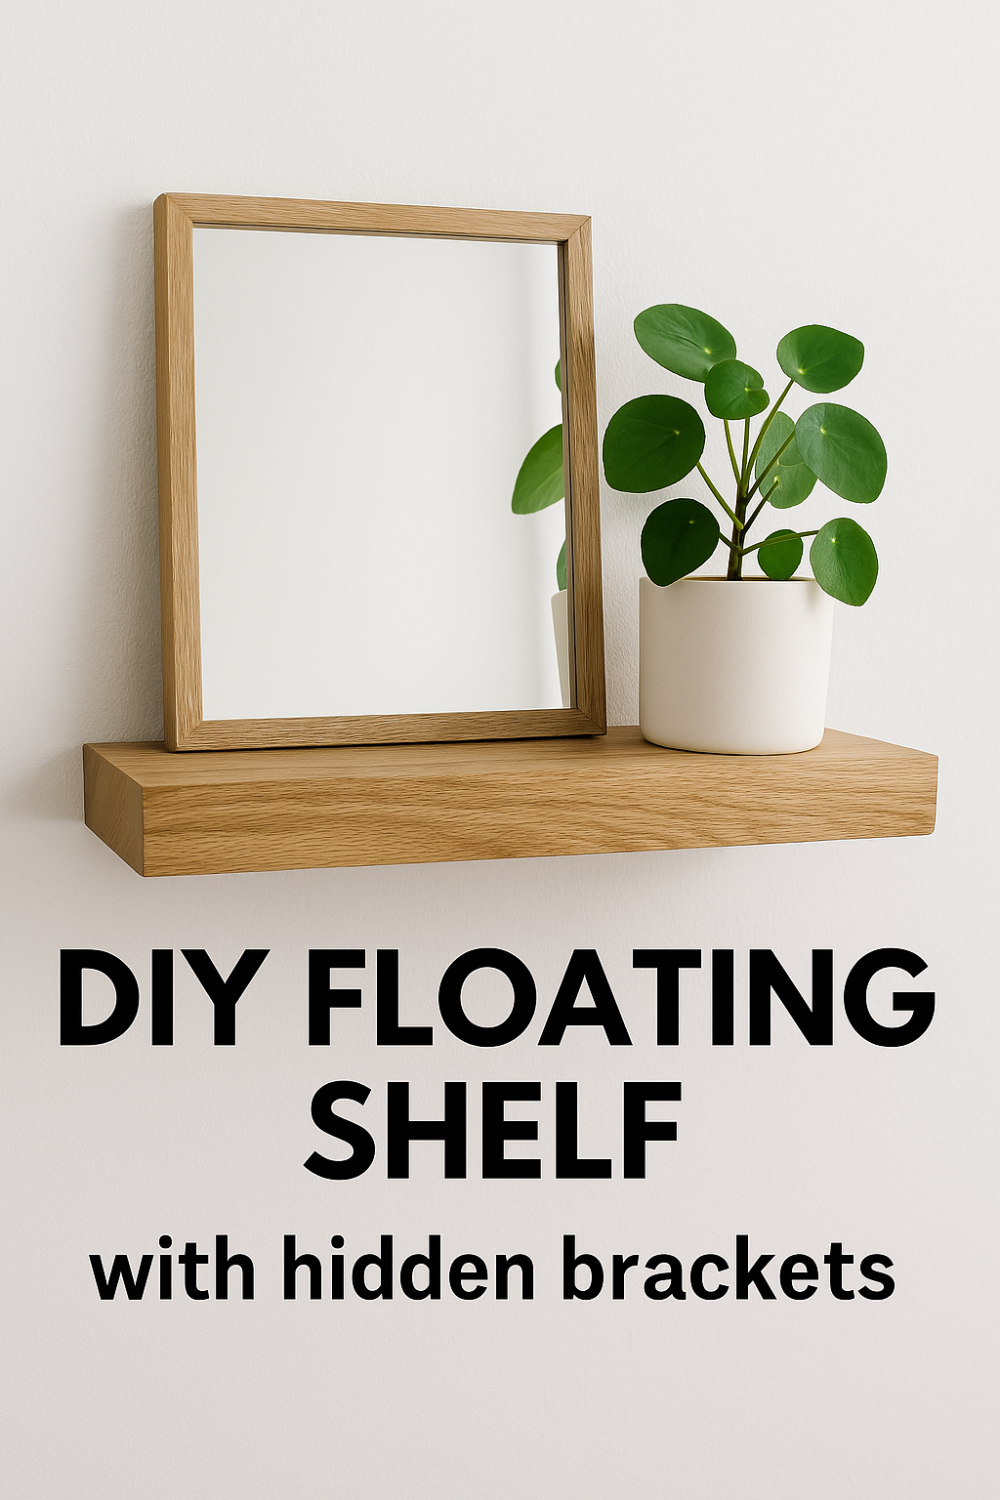
Floating shelves exemplify minimalist efficiency. They save space and create open storage that feels light and airy. Here’s a detailed breakdown to help you build your own:
- Materials Needed:
- Wooden boards (choose solid pine or oak for a natural look)
- Hidden floating shelf brackets (wall-mounted type)
- Wall anchors and screws
- Power drill, level, measuring tape
- Sandpaper and finishing materials (e.g., matte clear coat or wood oil)
- Step-by-Step Instructions:
- Measure and Plan: Determine the ideal shelf location and dimensions based on your wall space. Mark bracket positions with a level to ensure straight alignment.
- Cut the Wood: Cut the wooden boards to your desired shelf length using a saw. Standard lengths are typically between 24″ to 48″.
- Sand and Finish: Smooth the wood surface and edges using sandpaper. Apply your choice of natural finish (e.g., Danish oil or clear matte varnish) to highlight the grain and protect the wood.
- Install the Brackets: Use wall anchors for drywall or masonry anchors for brick/concrete walls. Drill pilot holes and secure the hidden brackets firmly into the wall.
- Mount the Shelves: Slide the shelf boards onto the brackets until flush. Some brackets may include locking screws—tighten them for added stability.
- Styling Tips:
- Use shelves to display a curated selection of books, framed art, or ceramic vases.
- Leave some open space on the shelves for a breathable, uncluttered look.
- Best Locations:
- Over a desk or reading nook for extra storage.
- In a bathroom to hold towels, plants, or candles.
- In the kitchen for spices, jars, or minimalist dishware.
DIY floating shelves are both functional and beautiful—an ideal first project for incorporating minimalist architecture into your home in a practical way.
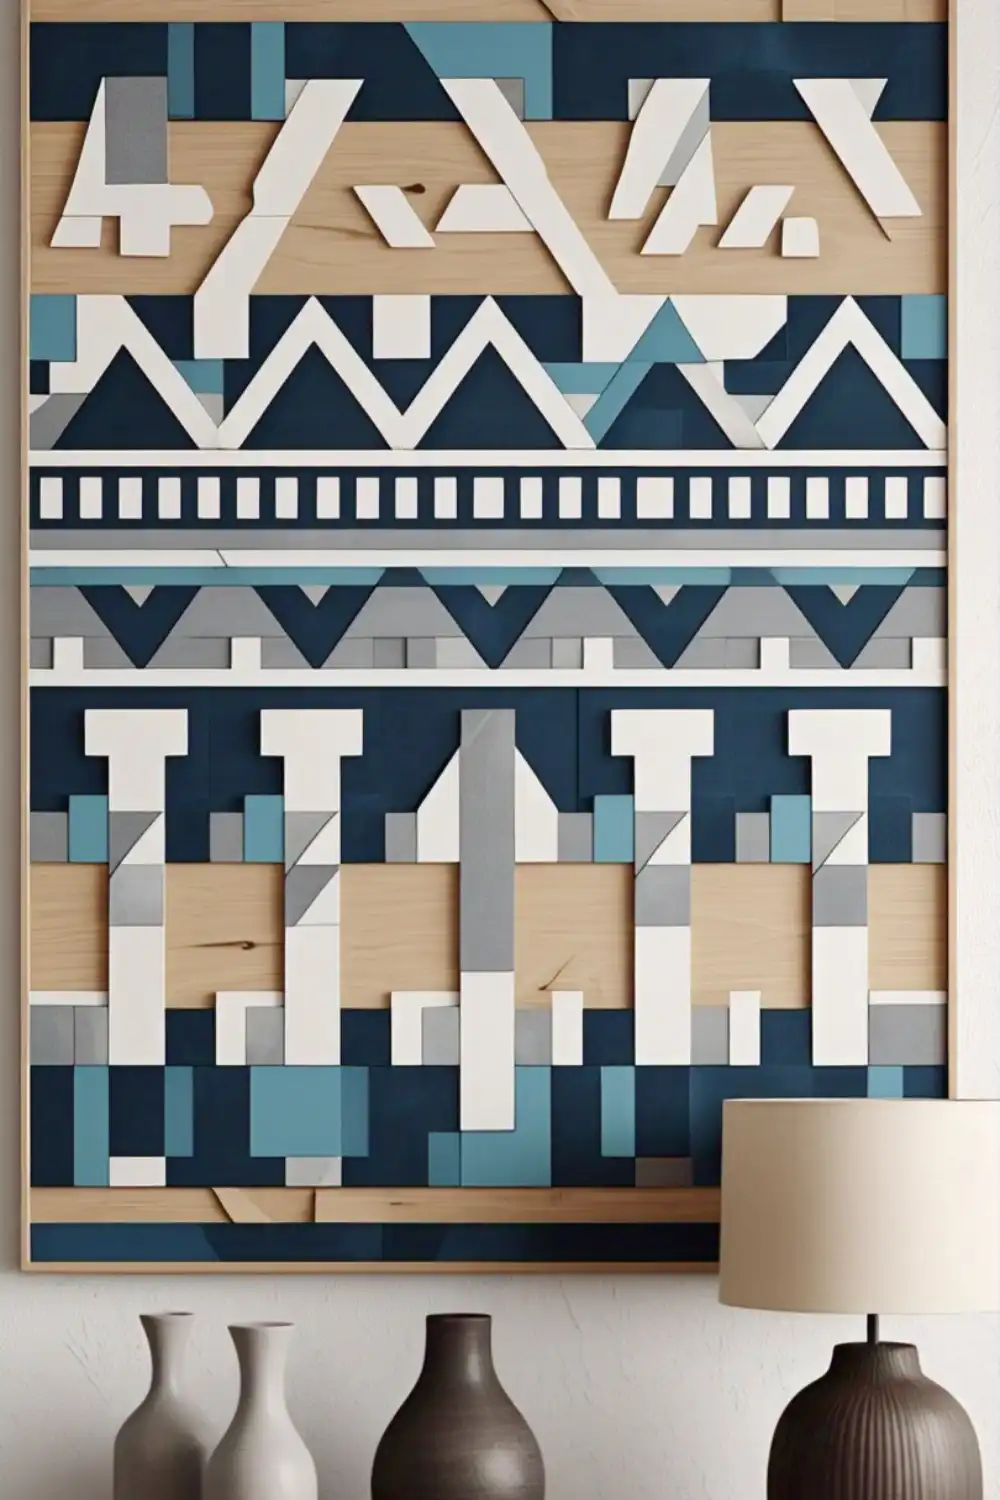
Project 2: Scandinavian-Inspired Wall Art
Scandinavian-inspired wall art is a perfect blend of minimalist aesthetics and personal expression. Rooted in the Nordic design tradition, this project focuses on calming forms, soft color palettes, and the use of natural materials. It’s a fantastic way to bring serenity and sophistication to your walls without overwhelming the space.
- Materials Needed:
- Stretched canvas or linen fabric mounted on a wooden frame
- Neutral-toned acrylic paints (beige, terracotta, taupe, soft black, dusty blue)
- Painter’s tape (optional for clean lines)
- Paintbrushes or sponges
- Hanging hardware (e.g., sawtooth hanger or command strips)
- Step-by-Step Instructions:
- Prepare Your Canvas: If using fabric, ensure it’s stretched tightly over the wooden frame. A linen texture works beautifully for a soft, organic feel.
- Sketch or Tape Your Design: You can freehand abstract shapes or use painter’s tape to block off geometric sections. Think imperfect circles, overlapping ovals, or simple arches.
- Paint in Layers: Apply one color at a time using a dry brush technique for subtle texture. Let each layer dry before adding the next to prevent smudging.
- Keep It Minimal: Limit your color palette to 2–3 hues and leave some canvas exposed to create balance and visual breathing room.
- Let It Dry and Mount: Once your artwork is completely dry, add the hardware and hang it where it can be appreciated—above a console table, in a hallway, or as a calming focal point in your living room.
- Pro Tips:
- Use matte acrylic paint to reduce shine and enhance the earthy aesthetic.
- Pair with a matching neutral-toned frame or leave the canvas edges exposed for a raw, artistic look.
- Group two or three pieces together for a modern gallery wall.
This DIY project allows you to create personalized artwork that aligns with the principles of minimalist decor while reflecting your unique creativity.
Project 3: Simple Wood-Framed Mirror
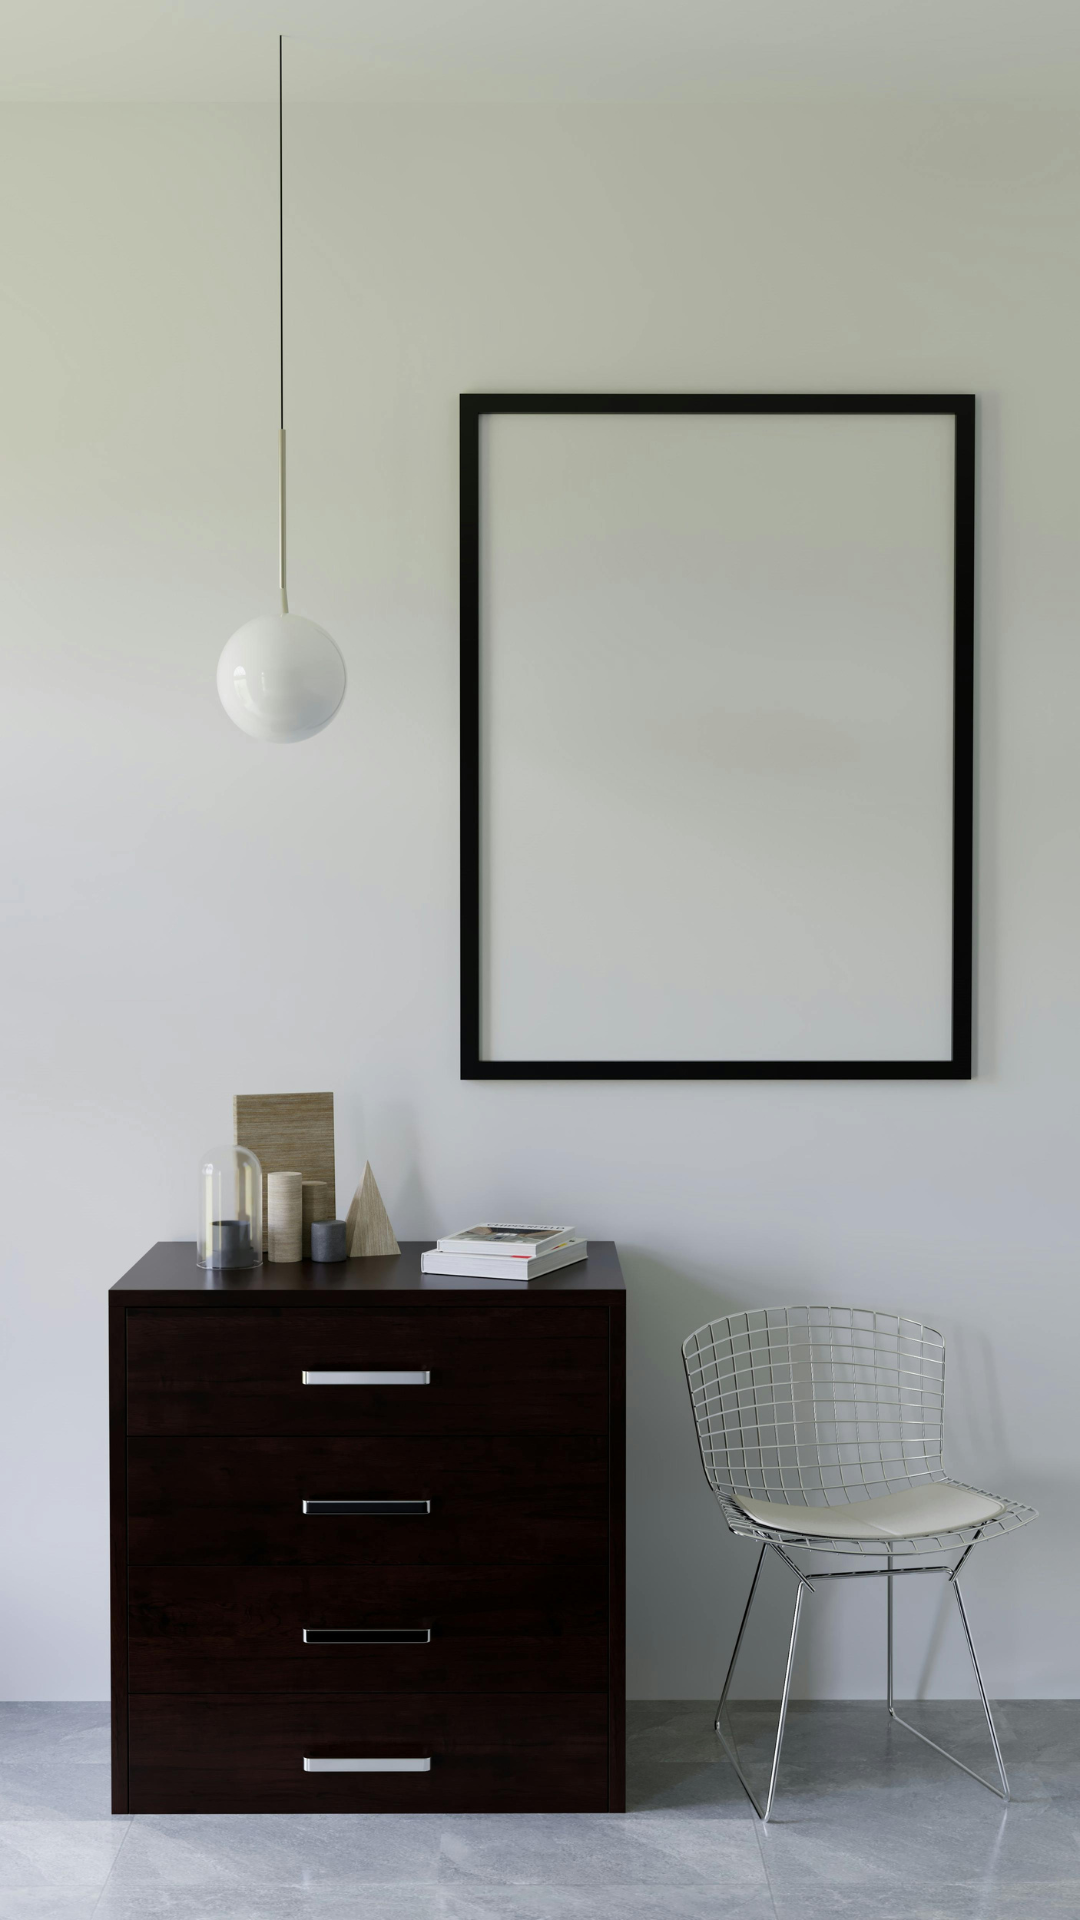
A wood-framed mirror is a minimalist staple that reflects natural light, making any room appear larger and more open. It serves both function and style, especially when crafted with natural wood for a touch of organic warmth. This project is surprisingly simple and budget-friendly.
- Materials Needed:
- Plain mirror (choose your desired size; rectangular or round)
- Wooden trim or furring strips (pine or oak works well)
- Wood glue or finishing nails
- Sandpaper, wood stain or clear finish
- Miter saw (or miter box and hand saw)
- Wall mounting hardware (D-rings, French cleat, or command strips)
- Step-by-Step Instructions:
- Measure and Cut the Frame: Measure the mirror and cut your wooden trim pieces at 45-degree angles for a clean mitered frame. Ensure all corners align perfectly.
- Sand and Finish: Sand all pieces until smooth. Apply your preferred wood stain or a matte clear coat for a natural finish. Let dry completely.
- Assemble the Frame: Use wood glue along the mitered edges or finishing nails to secure the corners. Use clamps to hold the frame together as it dries.
- Attach the Mirror: Secure the mirror to the back of the frame using strong adhesive or mirror clips. Be sure it’s centered and flush.
- Mount the Mirror: Attach hanging hardware to the back of the frame, then mount on the wall at eye level, ideally where it can reflect natural light.
- Styling Ideas:
- Hang above a minimalist console table in your entryway.
- Use it in a small bedroom to make the space feel larger.
- Pair with simple wooden pegs or wall hooks nearby for an integrated hallway look.
This mirror adds depth, warmth, and a sense of intentional elegance to your home while remaining perfectly aligned with minimalist principles.
Project 4: Japandi-Style Indoor Plant Stands
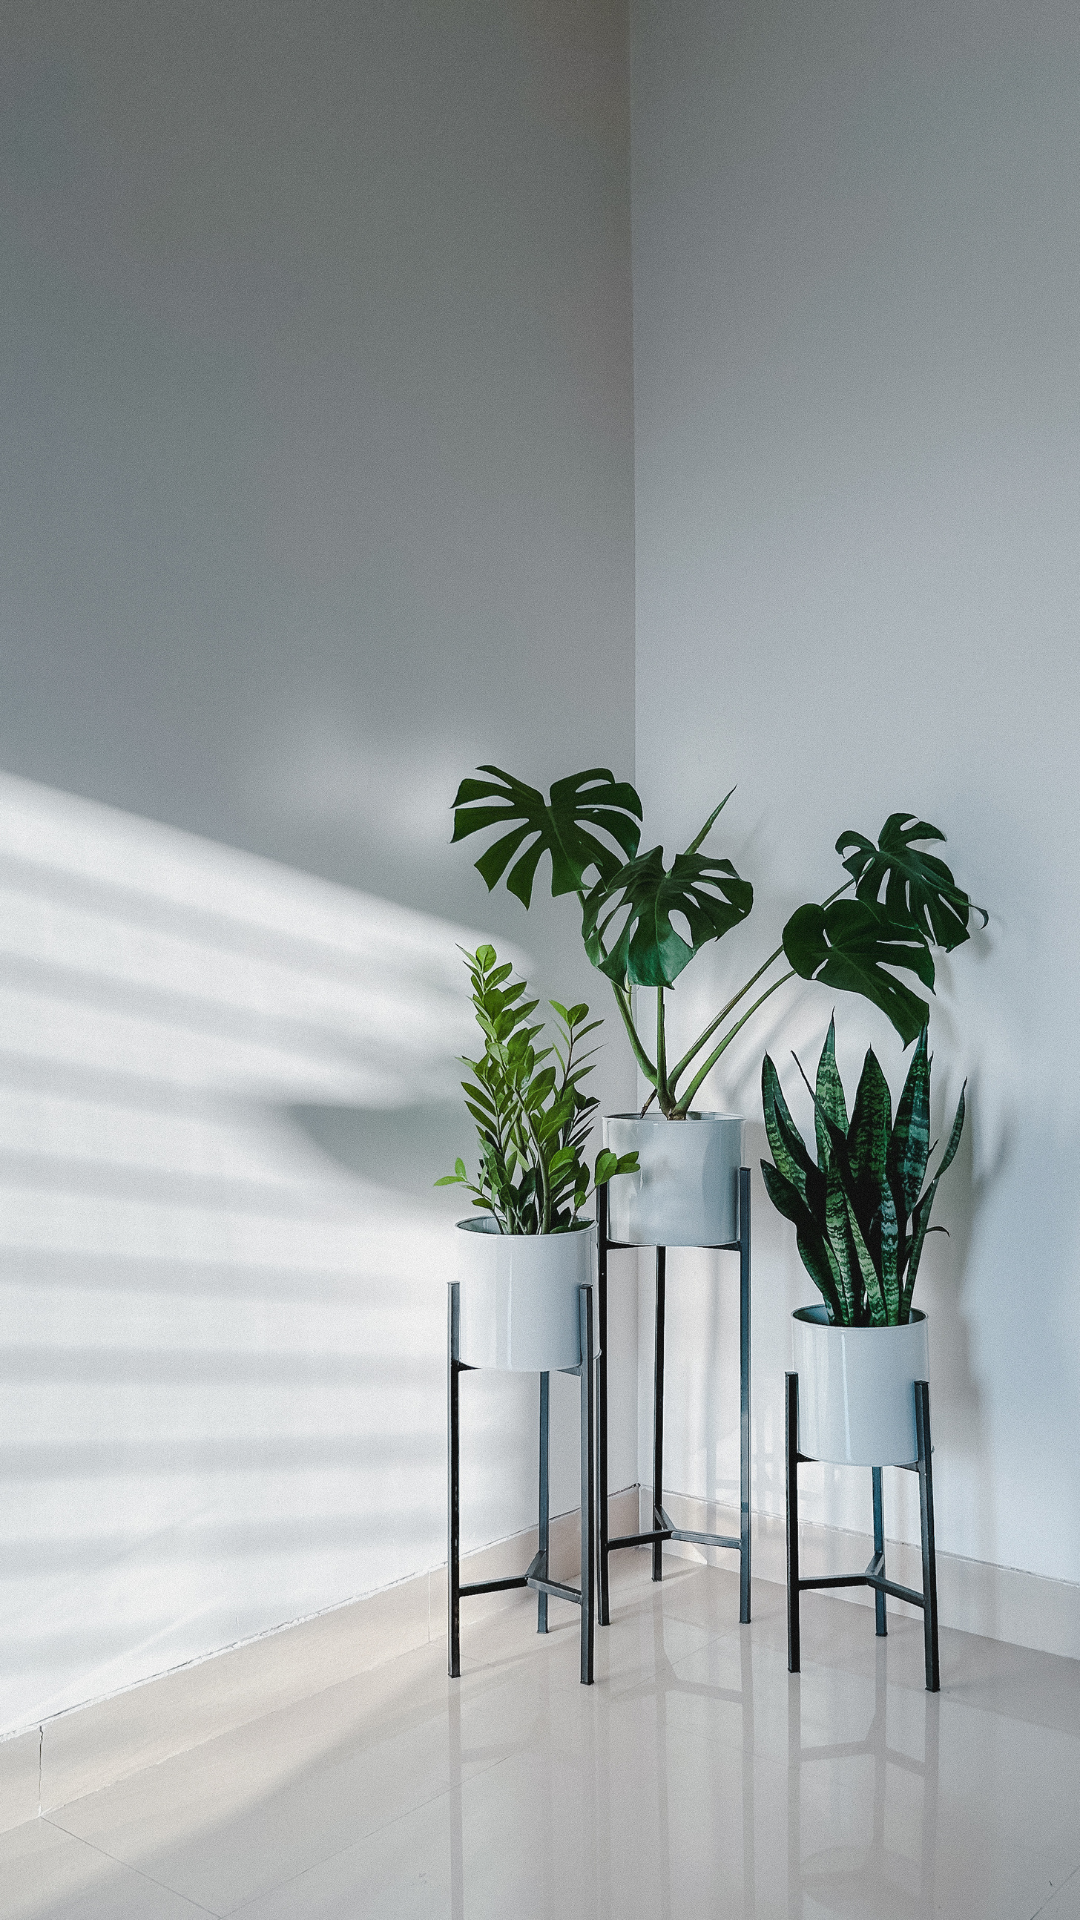
If you’re looking to add a serene and functional design element to your space, Japandi-style indoor plant stands offer the perfect blend of Japanese minimalism and Scandinavian warmth. These stands elevate your greenery—literally and aesthetically—by emphasizing clean lines, natural wood, and uncluttered simplicity. They’re ideal for plant lovers who want their decor to feel grounded, calming, and intentional.
Materials Needed:
-
Hardwood (like oak, beech, or pine) for legs and platform
-
Wooden dowels (for cross supports)
-
Wood glue
-
Finishing nails or small screws
-
Hand saw or miter saw
-
Drill and wood clamps
-
Sandpaper and natural finish (e.g., linseed oil, beeswax, or matte sealant)
Step-by-Step Instructions:
-
Design and Dimensions: Choose a height based on the plant and pot you want to display. Common heights are 10″–18″, and you can adjust width based on the pot diameter.
-
Cut the Wood: Cut four identical legs. Then cut two or four horizontal pieces to form a cross support at the base. For extra visual harmony, use angled cuts for the leg ends (10–15°) so they subtly splay outward.
-
Join with Dowels or Screws: Drill holes in the center of each horizontal piece and into the legs where they will meet. Use dowels and wood glue for a seamless, nail-free look. Alternatively, use screws for a quicker assembly—just be sure to countersink and fill for a cleaner finish.
-
Sand and Finish: Once assembled, sand all edges and surfaces. Apply a natural, low-sheen finish that enhances the wood grain and keeps the tone warm but soft.
-
Let It Cure and Style: Let the finish cure fully before placing any plant pots on the stand. Test stability on a flat surface before positioning it permanently.
Styling Tips:
-
Pair your stand with matte ceramic or clay pots in neutral tones (white, beige, charcoal).
-
Cluster several stands of varying heights for a modern indoor garden vibe.
-
Place near windows or corners with good natural light to enhance both plant growth and visual appeal.
Perfect Plant Choices:
-
Monstera Deliciosa for a sculptural look
-
Snake Plant for structure and low maintenance
-
Pilea Peperomioides for soft, rounded shapes that complement the angular lines of the stand
Why It Works in Minimalist Decor:
Japandi-style plant stands support the minimalist philosophy of “less but better.” They celebrate raw materials and honest craftsmanship. With their elevated form and simple construction, these DIY stands double as artful furniture and botanical pedestals.
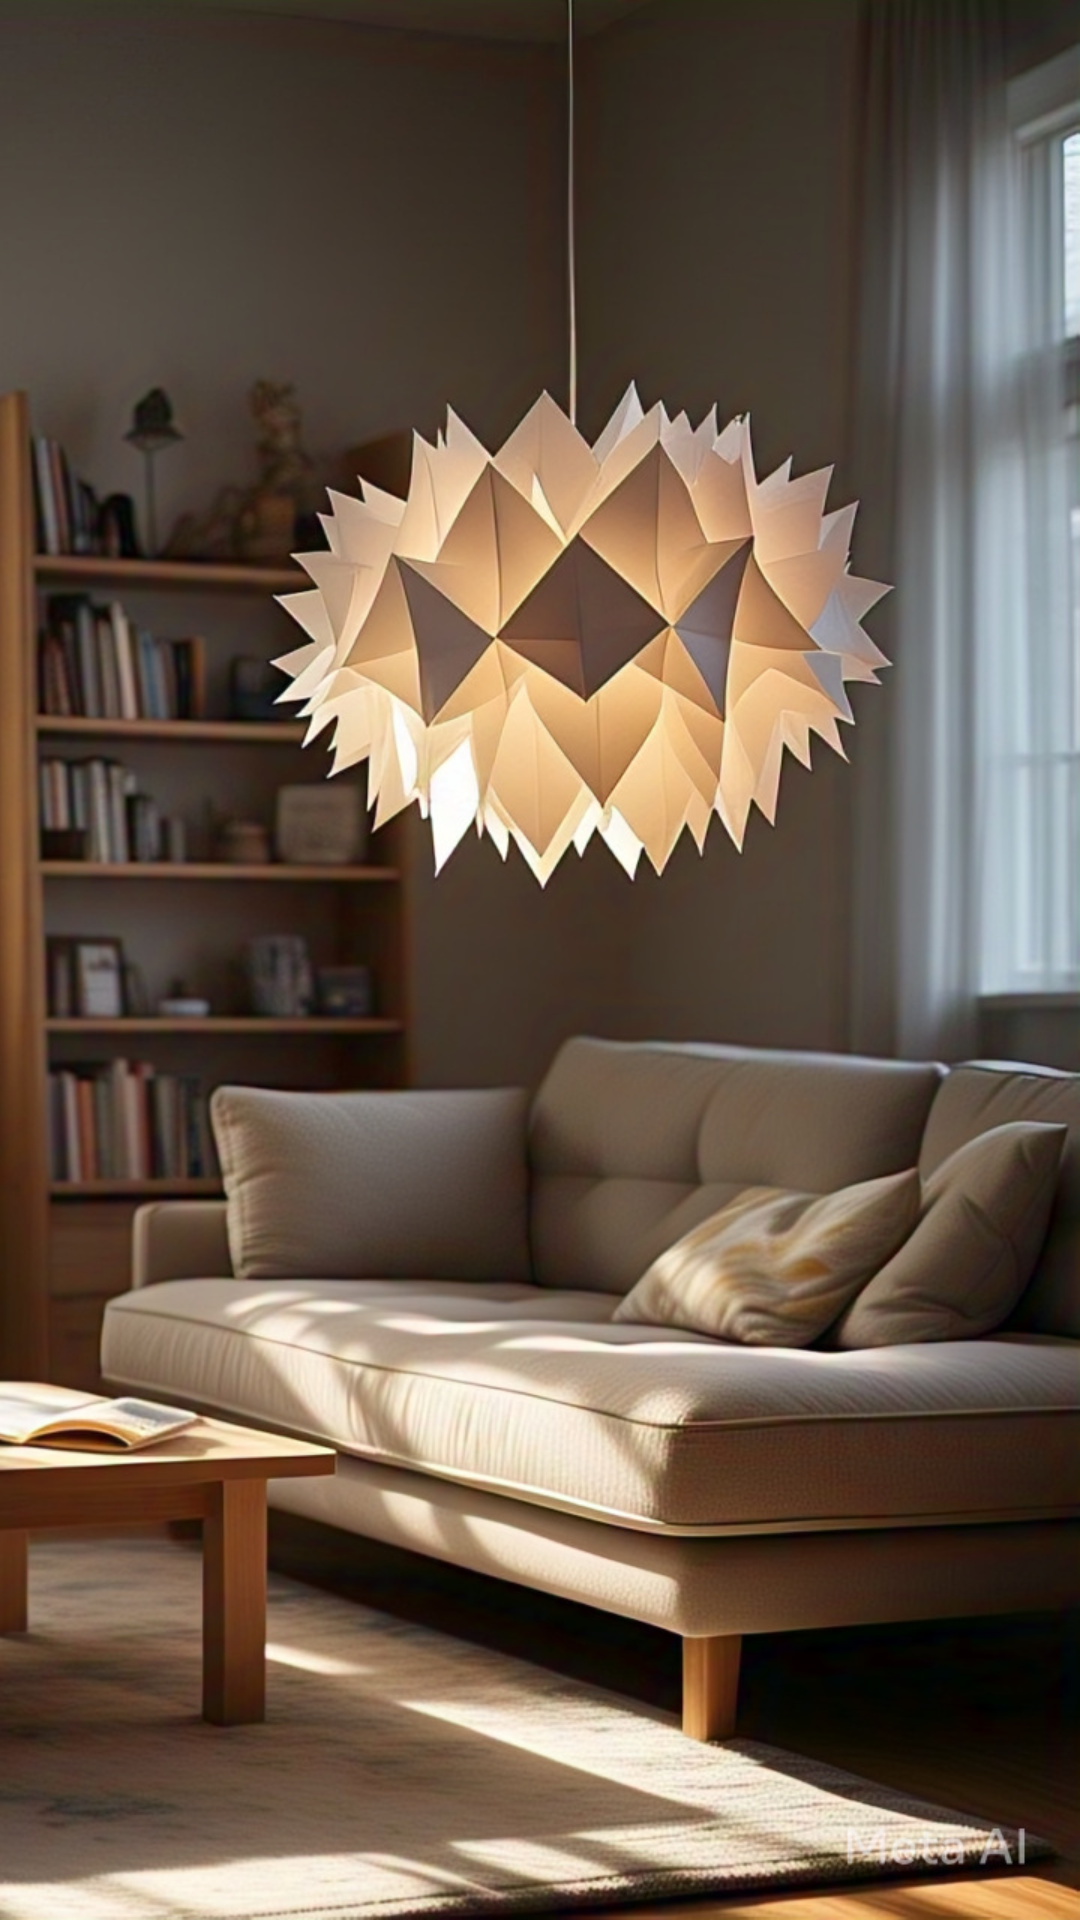
Project 5: Soft Lighting with DIY Paper Lanterns

Lighting plays a crucial role in setting the mood in minimalist homes. Harsh or overly bright lighting can disrupt the calm, while soft, diffused light brings warmth and comfort. One of the most budget-friendly and visually soothing options is a DIY paper lantern. These lanterns cast a soft glow and add a handcrafted, organic element to your home decor.
- Materials Needed:
- Rice paper or parchment paper (you can also use upcycled paper bags for a rustic feel)
- Thin wire or embroidery hoops (to create the frame)
- White string lights or LED candles
- Hot glue gun or strong adhesive
- Scissors, ruler, and craft knife
- Step-by-Step Instructions:
- Create the Frame: Shape your wire into a sphere, cylinder, or oval shape depending on your aesthetic preference. You can use embroidery hoops for perfect circles or form your own shapes with wire.
- Cut the Paper Panels: Measure and cut your rice paper to fit over the frame with enough room for overlapping seams. For a glowing layered effect, double up on thinner papers.
- Attach the Paper to the Frame: Use a glue gun to carefully attach each paper section to the frame. Smooth the paper as you go to avoid creases, but don’t worry about small imperfections—they add to the handcrafted charm.
- Install the Light Source: If using LED candles, place them inside the lantern once fully assembled. For string lights, you can wind them around the frame or insert them gently inside.
- Hang or Place: Attach a loop to the top and hang from the ceiling for a floating lantern, or place on a side table or corner of a room for ambient lighting.
- Design Tips:
- Stick to neutral or soft white paper to maintain a minimalist palette.
- For added interest, try layering semi-transparent papers or cutting geometric patterns into the outer layer to create light play.
- Combine different sizes and hang at varying heights for a dynamic cluster effect in a hallway or reading nook.
- Why It Works:
- The natural, diffused glow softens harsh corners and adds warmth without clutter.
- Paper lanterns complement other natural textures in minimalist interiors like wood, linen, and stone.
- Their simple structure allows your eyes to rest, fostering a relaxing environment.
This project invites you to slow down and create something serene. It’s a small detail that makes a big difference—transforming everyday lighting into a cozy, minimalist design feature.
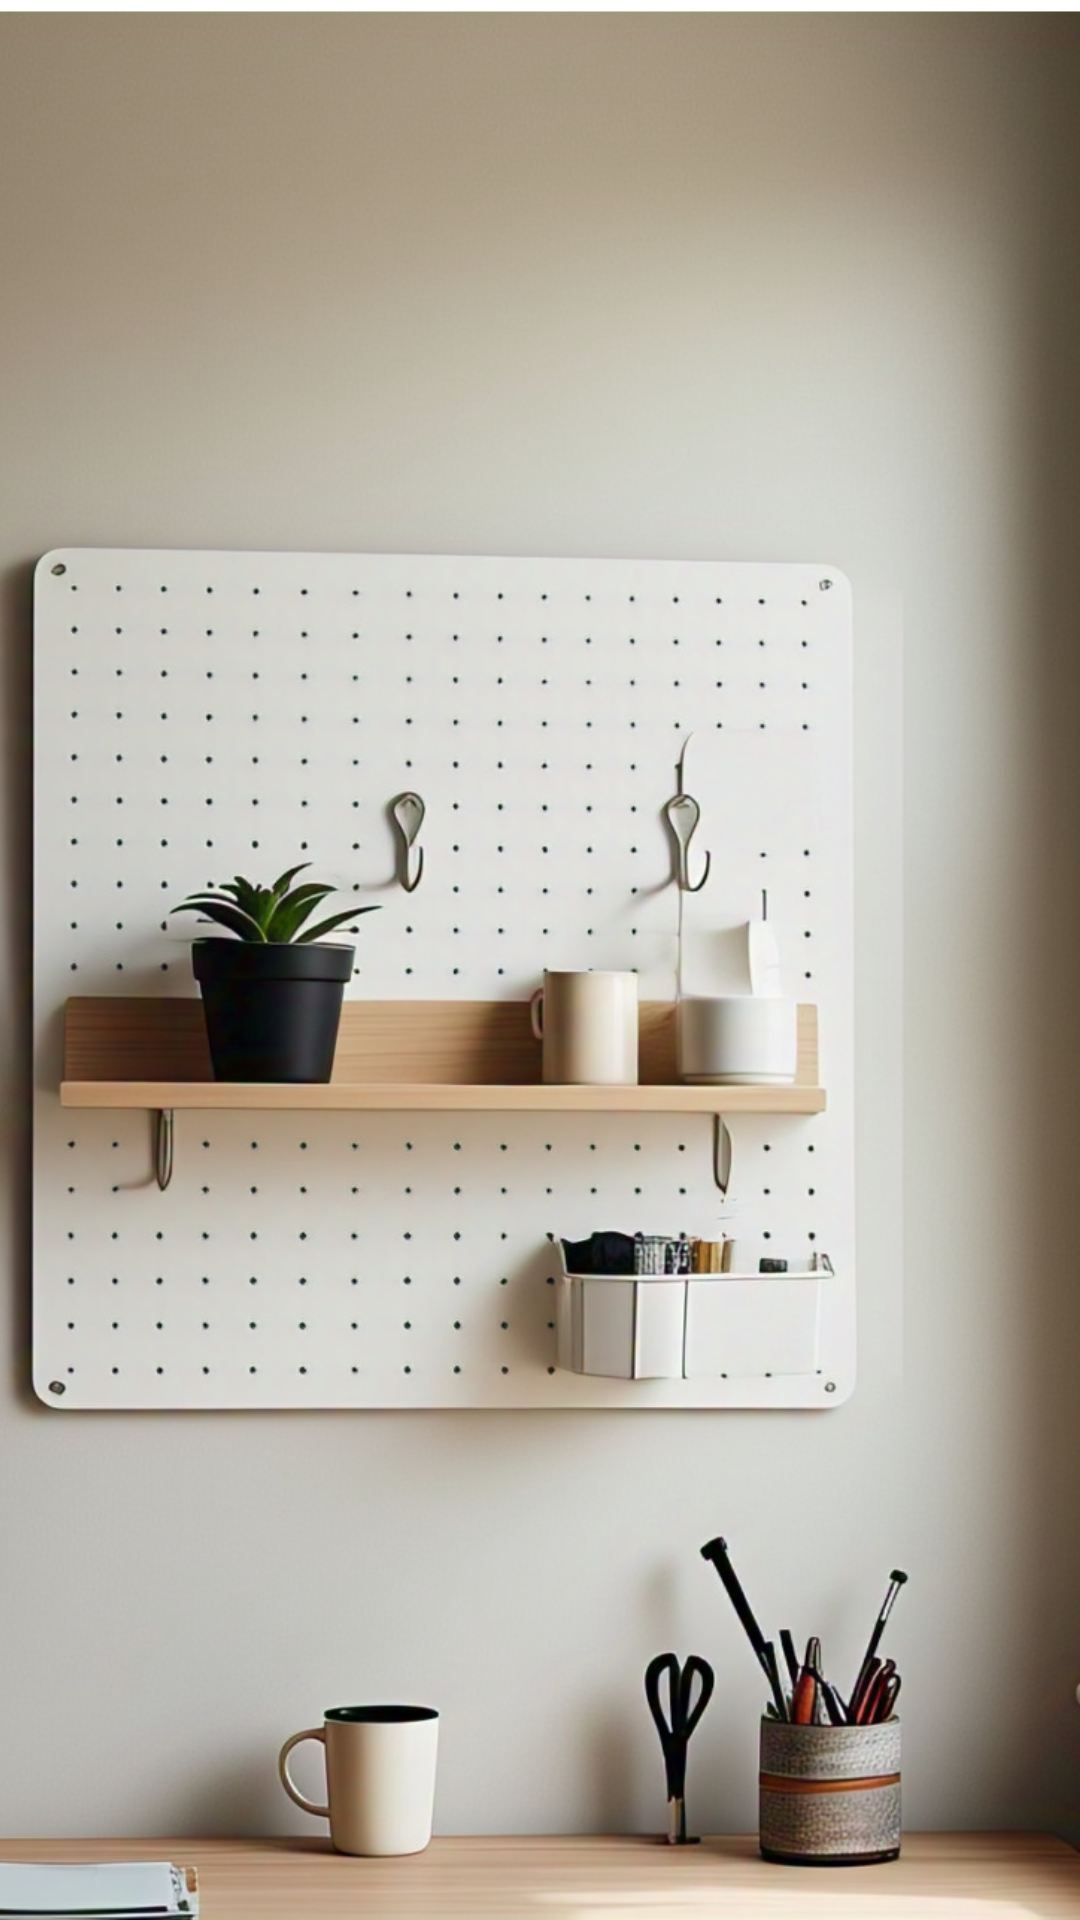
Project 6: Minimalist Pegboard Organizer
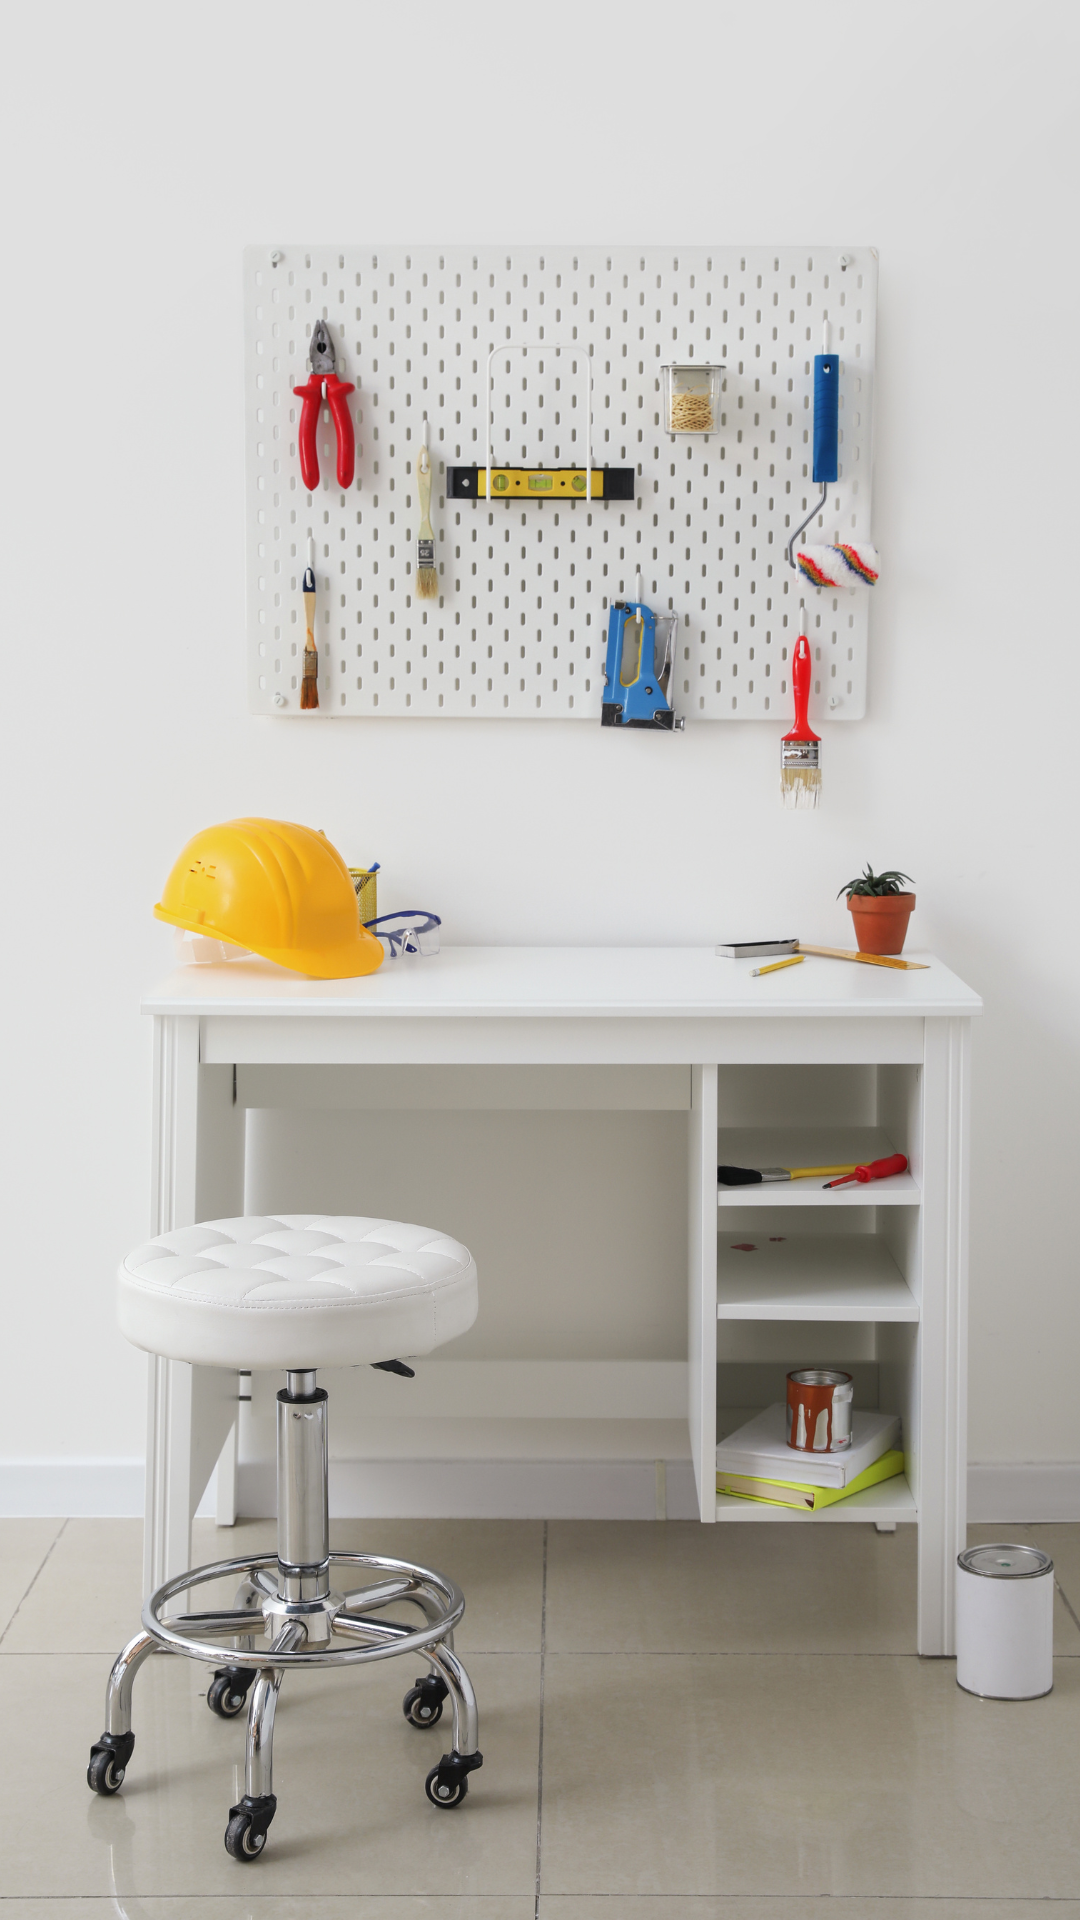
An essential principle of minimalist design is that everything should have its place—and that’s where a DIY pegboard organizer becomes both a stylish and functional addition. Pegboards are not only space-saving but can also be customized to fit your aesthetic. Perfect for entryways, kitchens, offices, or craft corners, this DIY helps keep clutter off your surfaces while still looking intentional and polished.
- Materials Needed:
- A smooth plywood board (1/2 inch thickness recommended)
- Wooden dowels (3/4 inch diameter)
- Drill with a spade bit matching dowel size
- Sandpaper or sanding block
- Ruler, pencil, and measuring tape
- Wood stain or paint (optional for finishing)
- Wall mounting kit or French cleats
- Step-by-Step Instructions:
- Measure and Mark Holes: On the plywood board, mark a grid where you want your pegs. Common spacing is about 2 inches apart. Keep spacing even for a balanced and modern appearance.
- Drill the Holes: Using a spade bit that matches the diameter of your dowels, carefully drill straight through the board at each marked point. Sand each hole to remove splinters.
- Cut and Sand Dowels: Cut your wooden dowels into equal lengths (4 to 6 inches is typical). Sand the edges to smooth out any roughness.
- Finish the Board (Optional): Apply a light wood stain or paint to match your interior. Allow it to dry completely.
- Mount the Pegboard: Use French cleats or a sturdy wall-mounting kit to securely fix the board to the wall.
- Insert Dowels and Organize: Arrange your dowels in a configuration that works for your needs—hang baskets, small shelves, keys, mugs, or even mini planters.
- Design Tips:
- Leave some pegs empty for breathing room—minimalism values negative space.
- Use monochrome or natural wood tones to maintain a clean, cohesive look.
- Rotate your layout seasonally or as your needs change; pegboards are endlessly versatile.
- Why It Works:
- Keeps surfaces clutter-free while showcasing only what matters.
- Combines utility with beauty, especially when styled with restraint.
- Ideal for small spaces where vertical organization can make a big impact.
This project proves that organization doesn’t have to be hidden away. With a minimalist pegboard, you’re turning function into an art form.
Project 7: Natural Linen Throw Pillows
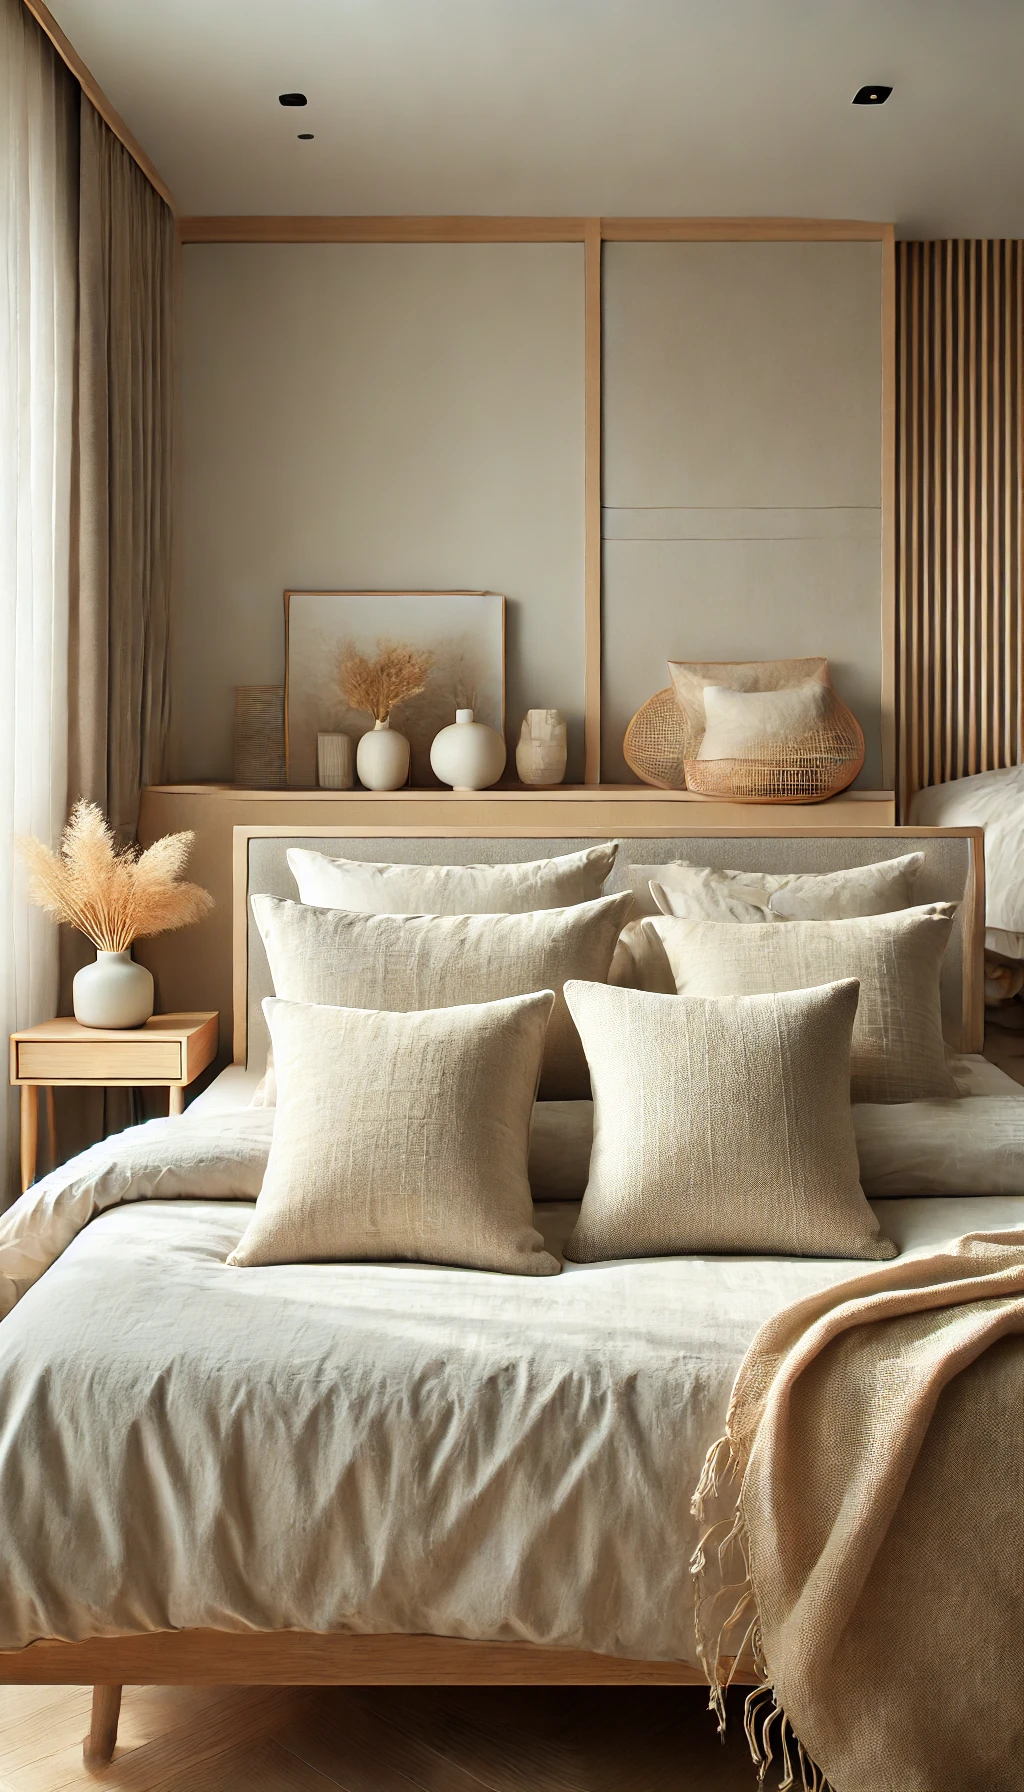
Soft textures are key to creating a cozy, minimalist space—and nothing says comfort like a set of handmade linen throw pillows. Unlike overly patterned cushions, minimalist throw pillows emphasize clean shapes, subtle texture, and neutral hues. They make a couch or bed feel warmer without visual clutter.
- Materials Needed:
- Natural linen fabric (or cotton-linen blend)
- Pillow inserts (size of your choice)
- Sewing machine or needle and thread
- Scissors, pins, ruler or measuring tape
- Invisible zipper or button closure (optional)
- Step-by-Step Instructions:
- Cut the Fabric: Measure your pillow insert and cut two pieces of linen fabric to size, adding 1 inch seam allowance on all sides.
- Sew the Edges: Place the fabric pieces together, right sides facing in. Sew around three sides, leaving the bottom open.
- Attach Closure: For a professional finish, add an invisible zipper or stitch on a few wooden buttons. Alternatively, you can hand-sew the final seam after inserting the pillow.
- Insert Pillow: Turn the cover right side out, press the seams, and insert the pillow.
- Design Tips:
- Choose fabrics in warm whites, soft greys, or muted earth tones.
- Add hand-stitched edges or subtle embroidery for texture without overstatement.
- Use slightly oversized inserts for a fuller, high-end look.
- Why It Works:
- Adds a soft, organic element to hard surfaces like wood or leather.
- Enhances comfort while maintaining visual simplicity.
- Easy to swap out seasonally while sticking to your core palette.
DIY linen pillows offer the perfect blend of comfort and restraint—an elegant nod to cozy minimalism.
Project 8: Minimalist Table Centerpiece with Dried Botanicals
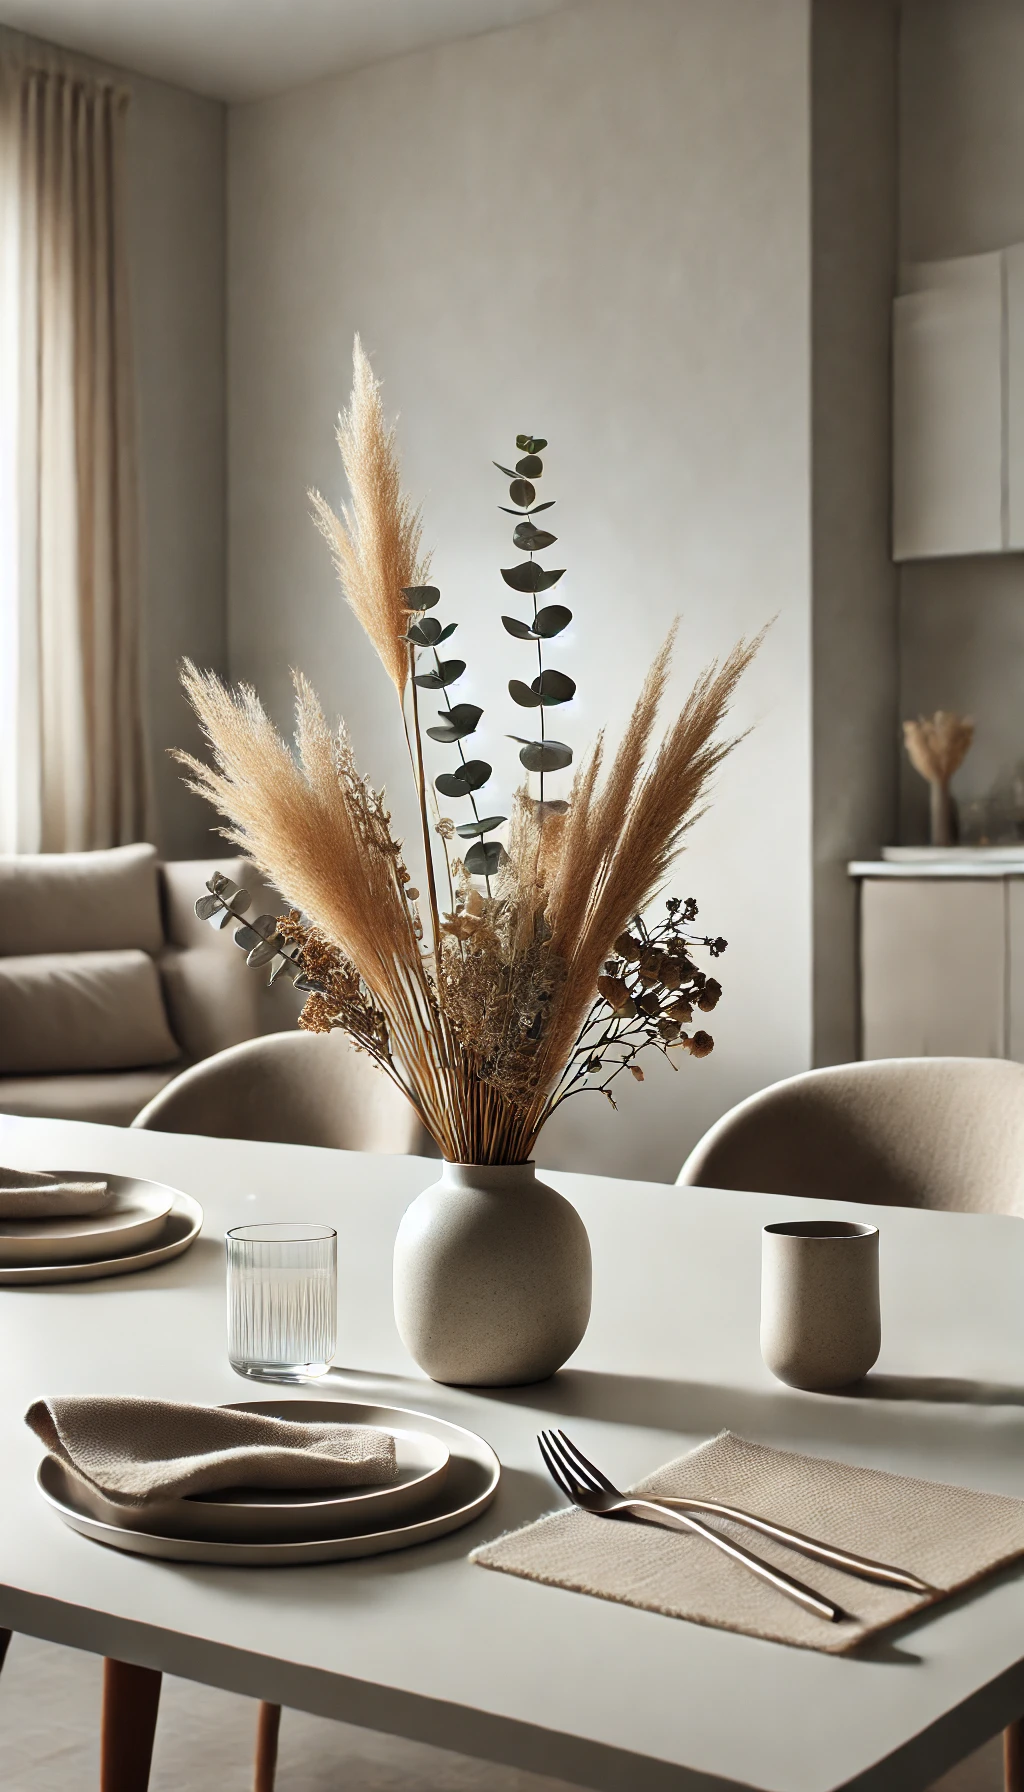
Centerpieces often become the visual focal point of a room, but they don’t need to be extravagant to make a statement. This DIY project creates an understated, elegant arrangement using dried botanicals and natural textures—a tribute to minimalism and nature combined.
- Materials Needed:
- A neutral-toned ceramic or glass vase
- Dried botanicals (e.g., pampas grass, eucalyptus, bunny tail grass)
- Optional: twine or linen ribbon for decoration
- Step-by-Step Instructions:
- Choose Your Vase: Select a simple vase with clean lines and a matte or clear finish.
- Prepare Botanicals: Trim the stems of your dried plants at varying heights to add dimension and visual interest.
- Assemble Arrangement: Start with the tallest stems in the center and fan out the shorter pieces around them. Keep the arrangement loose and airy.
- Decorate the Vase: Wrap a piece of linen ribbon or twine around the neck for a soft accent (optional).
- Design Tips:
- Stick to one or two types of botanicals for cohesion.
- Place the centerpiece on a natural wood or linen runner for added warmth.
- Rotate seasonally with different dried blooms.
- Why It Works:
- Dried botanicals last indefinitely, making it a low-maintenance decor option.
- Brings an organic, textural element into your space.
- Complements neutral and natural material palettes seamlessly.
This minimalist centerpiece is perfect for dining tables, coffee tables, or sideboards—inviting nature into your home without the need for constant upkeep.
Project 9: Wall-Mounted Wooden Candle Holders
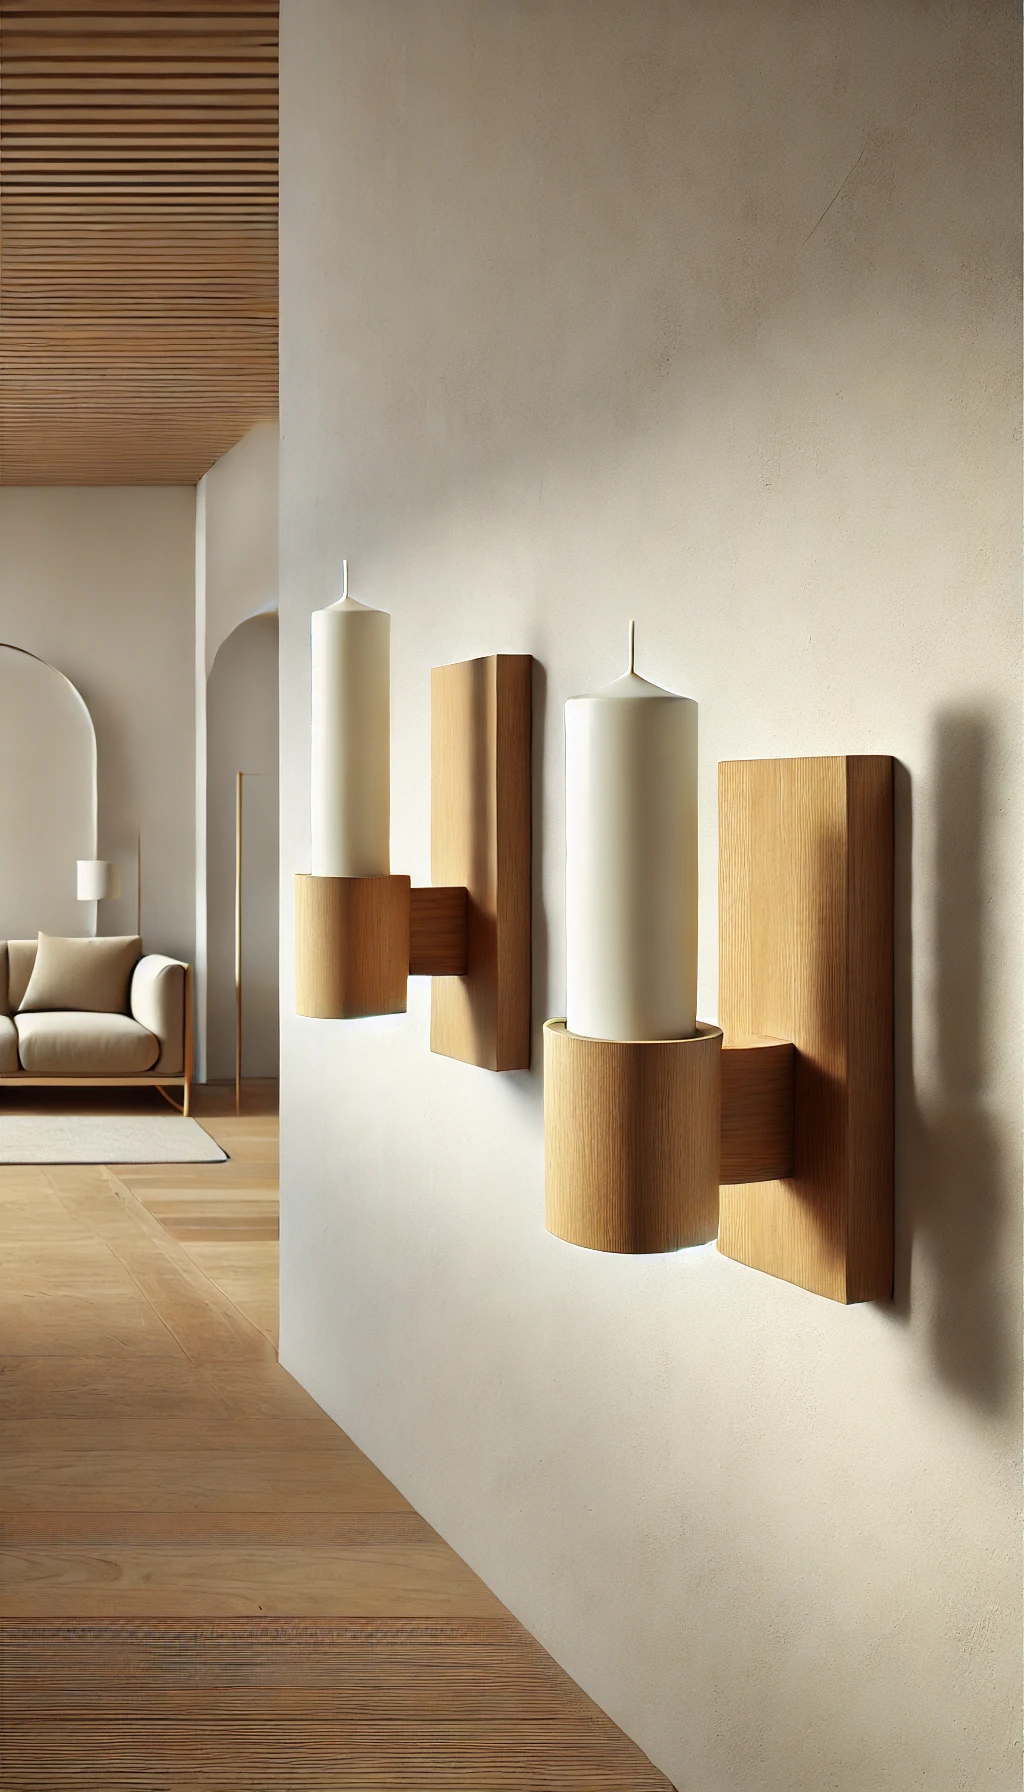
Introduce a warm and ambient glow to your minimalist space with handcrafted wooden candle holders. Mounted directly onto the wall, this project not only saves space but also adds a sculptural, earthy element that blends seamlessly into modern minimalist decor.
- Materials Needed:
- Small wooden blocks (around 2×4 inches)
- Tea light candle inserts or glass votive holders
- Wall mounting hardware (e.g., screws and anchors)
- Sandpaper, wood stain or natural oil
- Drill and chisel (if creating inset holders)
- Step-by-Step Instructions:
- Prepare the Blocks: Sand the wood pieces until smooth. Apply a wood stain or natural oil to enhance the grain and protect the surface.
- Create Candle Insets: Drill a hole or chisel out a shallow space to fit your tea light or votive holder securely.
- Mount on the Wall: Use anchors and screws to attach the blocks to the wall. Align at varying heights for visual interest.
- Insert Candles: Place the candles into the holders and light for a soft, warm ambiance.
- Design Tips:
- Use reclaimed wood for extra character and sustainability.
- Space the holders apart to create a gallery-like wall installation.
- Choose unscented candles to maintain the minimalist sensory atmosphere.
- Why It Works:
- Combines mood lighting with natural materials.
- Utilizes wall space, reducing surface clutter.
- Adds architectural interest with simple geometry.
These candle holders bring a sense of intimacy and tranquility to any space—ideal for minimalist bedrooms, reading nooks, or cozy dining areas.
Project 10: DIY Minimalist Concrete Planters
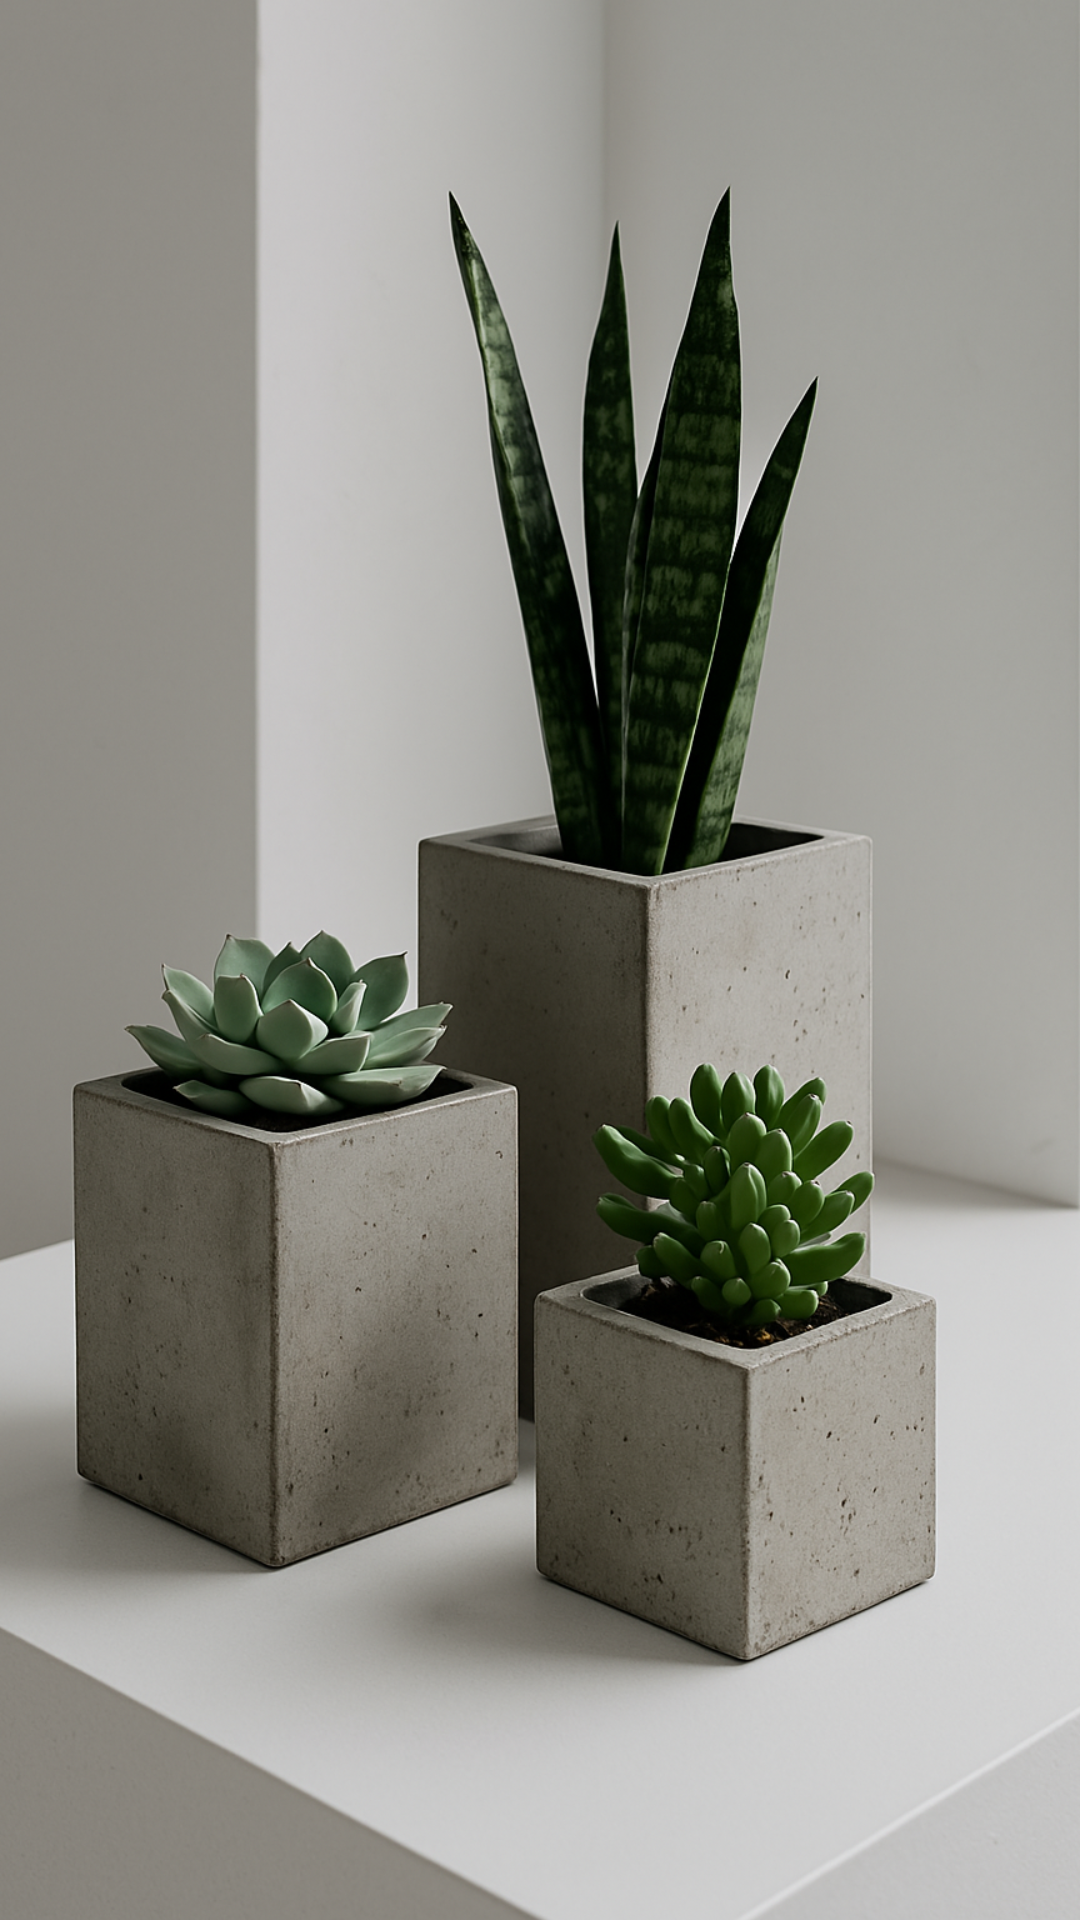
Concrete planters are a staple of modern minimalist design—simple, raw, and beautifully imperfect. With just a few tools and materials, you can create sleek vessels that elevate your indoor plants while adding an industrial, organic touch to your decor.
- Materials Needed:
- Quick-set concrete mix
- Two nesting containers (plastic or silicone, one smaller than the other)
- Cooking spray or mold release
- Sandpaper (medium and fine grit)
- Optional: black pigment or natural dye for coloring
- Step-by-Step Instructions:
- Prepare the Molds: Spray the inside of the larger container and the outside of the smaller one with mold release.
- Mix and Pour Concrete: Prepare the concrete as directed on the packaging. If you want a tinted look, mix in a bit of black or earth-toned pigment.
- Pour Into Mold: Pour the concrete halfway into the larger mold. Press the smaller mold into the center to shape the planter cavity. Use weights to hold it down if it floats.
- Cure and Remove: Let the concrete cure completely (usually 24–48 hours), then gently remove the molds.
- Finish the Surface: Sand the edges and any rough spots for a smooth, refined finish.
- Design Tips:
- Vary the mold shapes to create a set of planters with different heights and diameters.
- Use a minimalist plant like a snake plant, pothos, or ZZ plant for a cohesive aesthetic.
- Leave the concrete raw or seal it with a matte finish to maintain its natural look.
- Why It Works:
- Concrete’s texture and neutral tone align perfectly with minimalist aesthetics.
- Easy to customize and replicate for gifts or multiple rooms.
- Adds an element of natural greenery while staying grounded in minimal design.
Whether placed on a shelf, table, or windowsill, these concrete planters add life and structure without overpowering your space. They’re a small touch that speaks volumes in a minimalist home.
Conclusion: Curate, Don’t Accumulate
Minimalist decor isn’t about sacrificing comfort—it’s about choosing it with intention. Each of these DIY projects invites you to pause, reflect, and design a home that reflects your values and style. Whether it’s the quiet beauty of natural materials or the joy of creating something with your own hands, the cozy minimalist approach brings more than aesthetics—it brings peace.
So go ahead, choose one project that resonates with you and give it a try. Let your space breathe. Let your creativity flow. And remember: in the world of minimalist design, less truly is more.
Here’s to cozy corners, clean lines, and homes that feel like a deep breath.
Happy making!
Ready to get started? Share your favorite project on social media and tag us—we’d love to see your creations! For more cozy DIY inspiration, don’t forget to subscribe to our newsletter and follow us on Pinterest!