We understand the kitchen is the heart of the home, a space where meals are prepared, memories are made, and conversations flow. However, transforming this functional area into a visually appealing and personalized space can often seem daunting. We are here to offer five easy DIY kitchen decor ideas that can be implemented today, offering a significant aesthetic upgrade without necessitating extensive renovation or significant financial investment.
1. Repurpose Existing Jars and Bottles for Stylish Storage Solutions
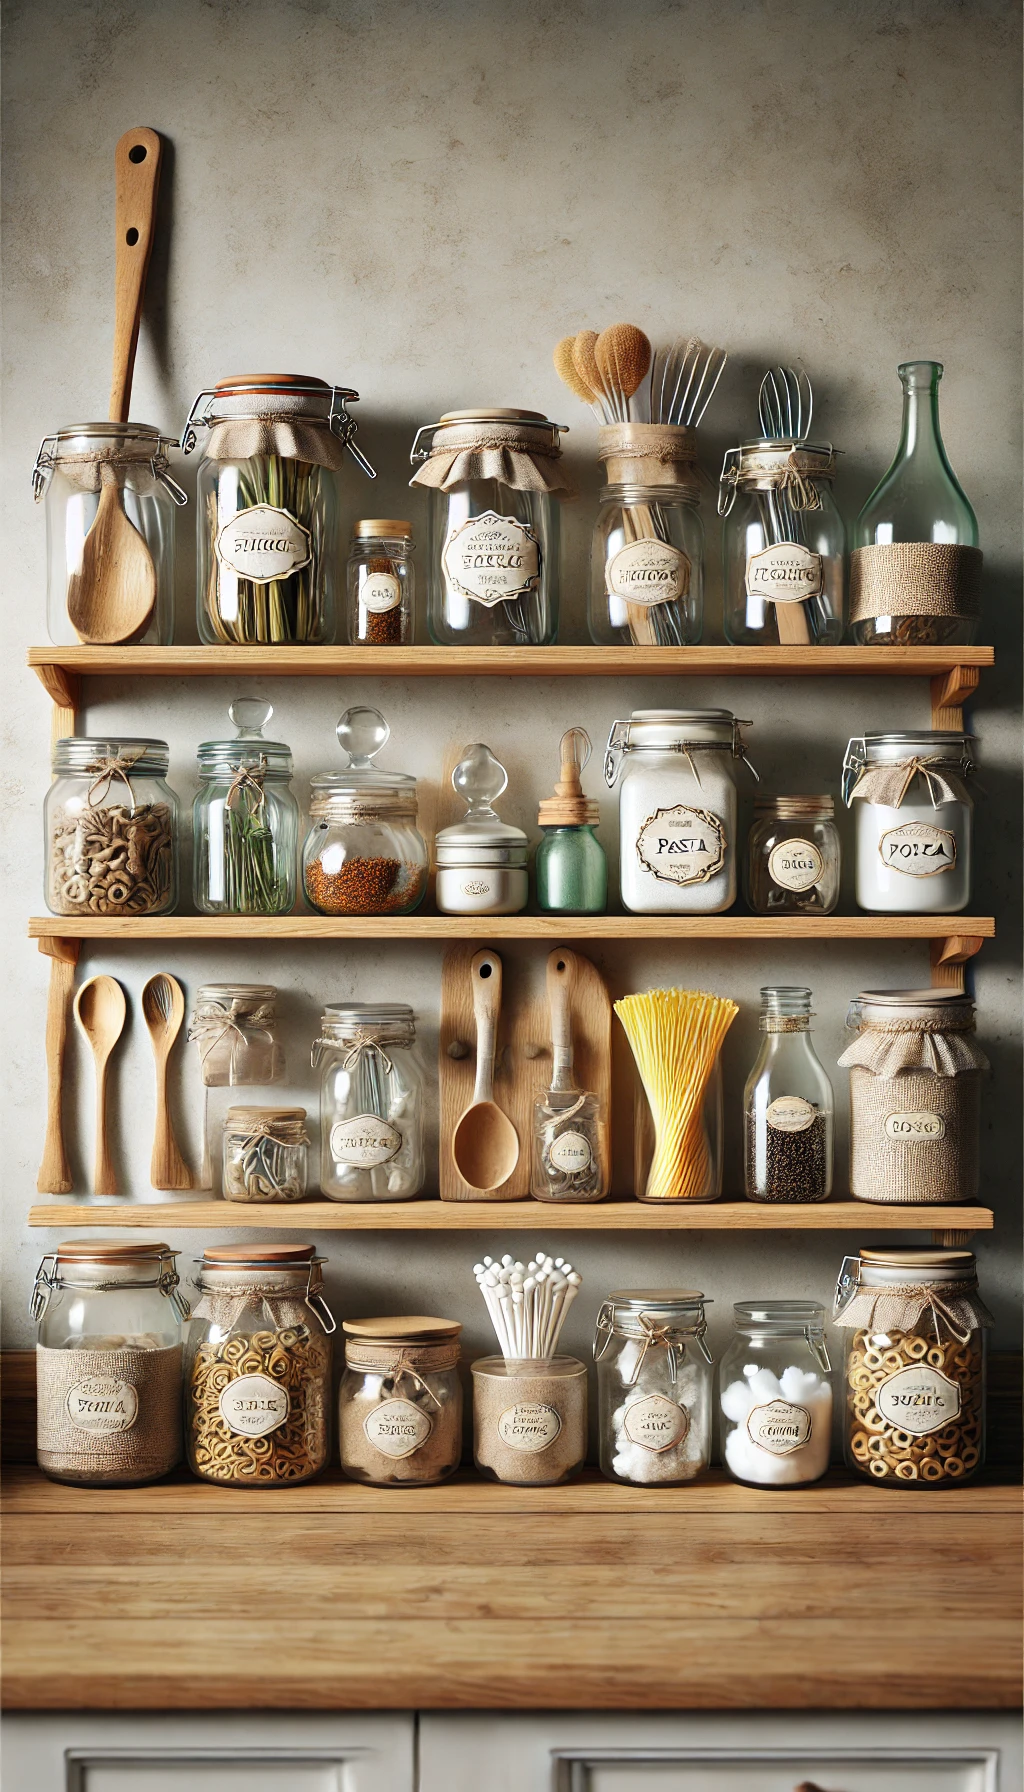
Instead of purchasing expensive storage containers, consider repurposing existing glass jars and bottles. This simple act not only promotes sustainability but also adds a rustic, charming touch to your kitchen. Clean and remove labels from jars of varying sizes. Fill them with dry goods such as pasta, rice, lentils, or spices. For a cohesive look, consider applying matching labels to each jar, indicating its contents. We recommend using chalkboard labels, which allow for easy updates and adjustments. For bottles, utilize them as vases for fresh herbs or flowers, or fill them with colored liquids for a vibrant display.
A collection of diverse shaped bottles can be arranged on open shelving, creating a visually interesting focal point. Furthermore, consider painting the lids of jars with metallic spray paint for a sophisticated touch. Optimize storage and elevate aesthetics simultaneously by strategically positioning these repurposed containers on countertops, shelves, or inside pantry cabinets.
5 DIY Kitchen Decor on a Budget, Transform Your Space with These Clever Ideas
The concept of repurposing existing jars and bottles transcends simple recycling; it’s an art form that blends sustainability with personalized aesthetics. We aim to transform these everyday items into functional and visually appealing storage solutions, elevating your kitchen’s organization and charm.
1. Strategic Selection and Preparation:
- Diverse Material Exploration: Beyond standard glass jars, consider unique bottles made from thicker glass or those with embossed designs. These add texture and character. Investigate ceramic jars or bottles from old cosmetic or food products for a more substantial feel.
- Thorough Cleaning and Label Removal: Employ a combination of hot water, dish soap, and baking soda to remove stubborn labels and residue. For particularly adhesive labels, soak the jars in a solution of warm water and vinegar. Utilize a razor blade or specialized adhesive remover for remaining traces. Ensure the interior is scrupulously clean to avoid any lingering odors or contaminants.
- Sterilization for Food Storage: If storing food items, sterilize the jars by boiling them in water for 10 minutes or running them through a dishwasher’s sanitize cycle. This prevents bacterial growth and extends the shelf life of your stored goods.
2. Customization and Aesthetic Enhancement:
- Lid Transformations: Beyond simple painting, explore lid customization. Fabric remnants can be glued to the tops for a soft, textured look. Leather scraps can be affixed for a rustic, industrial feel. For a more opulent touch, consider gilding the lids with gold or silver leaf.
- Labeling Techniques: Handwritten calligraphy labels offer a personal touch. Consider using waterproof ink or paint pens for durability. For a uniform aesthetic, create printable labels with consistent fonts and sizes. Apply labels neatly and evenly, ensuring they are securely adhered.
- Interior and Exterior Treatments: Tinted glass spray paint can transform clear jars into colored vessels, adding a vibrant element to your storage. For a frosted effect, use a specialized frosted glass spray. Decorate the interior of clear jars with dried flowers, decorative stones, or colored sand for a unique visual display.
- Textural Additions: Wrap twine, rope, or lace around the necks of bottles or jars for a rustic or bohemian touch. Secure these additions with hot glue or durable adhesive. Attach small charms, beads, or buttons for personalized embellishments.
3. Functional Storage Applications:
- Spice Organization: Arrange small jars on a spice rack or within a drawer, organizing spices by type or frequency of use. Clearly labeled jars enhance efficiency during cooking.
- Dry Goods Storage: Utilize larger jars for storing flour, sugar, pasta, and grains. Consider stacking jars on open shelves or within pantry cabinets, maximizing vertical space.
- Liquid Storage: Repurpose bottles with secure stoppers or corks for storing oils, vinegar, or homemade sauces. Ensure the bottles are thoroughly cleaned and sterilized before use.
- Utensil Holders: Large jars or wide-mouthed bottles can serve as stylish utensil holders. Arrange them on countertops, keeping frequently used tools within easy reach.
- Household Item Storage: Store cotton balls, swabs, or cleaning supplies in repurposed jars. These containers keep small items organized and prevent clutter.
- Seed and Herb Storage: Small bottles with tight fitting lids can be used to store seeds, or dried herbs.
- Coffee and Tea Storage: Larger jars are perfect for storing coffee beans or tea bags, keeping them fresh and organized.
4. Display and Arrangement:
- Tiered Displays: Utilize tiered shelves or risers to create visually appealing displays of repurposed jars and bottles. This maximizes visibility and accessibility.
- Grouping by Size or Color: Arrange jars and bottles in groups based on size, shape, or color, creating a cohesive and organized aesthetic.
- Open Shelving Integration: Incorporate repurposed storage solutions into open shelving displays, adding visual interest and functionality.
- Countertop Organization: Strategically place jars and bottles on countertops, keeping frequently used items within reach and minimizing clutter.
- Window Sill Displays: Utilize window sills for displaying smaller jars and bottles, adding a touch of natural light and visual appeal.
By implementing these detailed strategies, you can transform ordinary jars and bottles into extraordinary storage solutions, enhancing your kitchen’s functionality and aesthetic appeal.
2. Create a Personalized Chalkboard Menu or Message Board
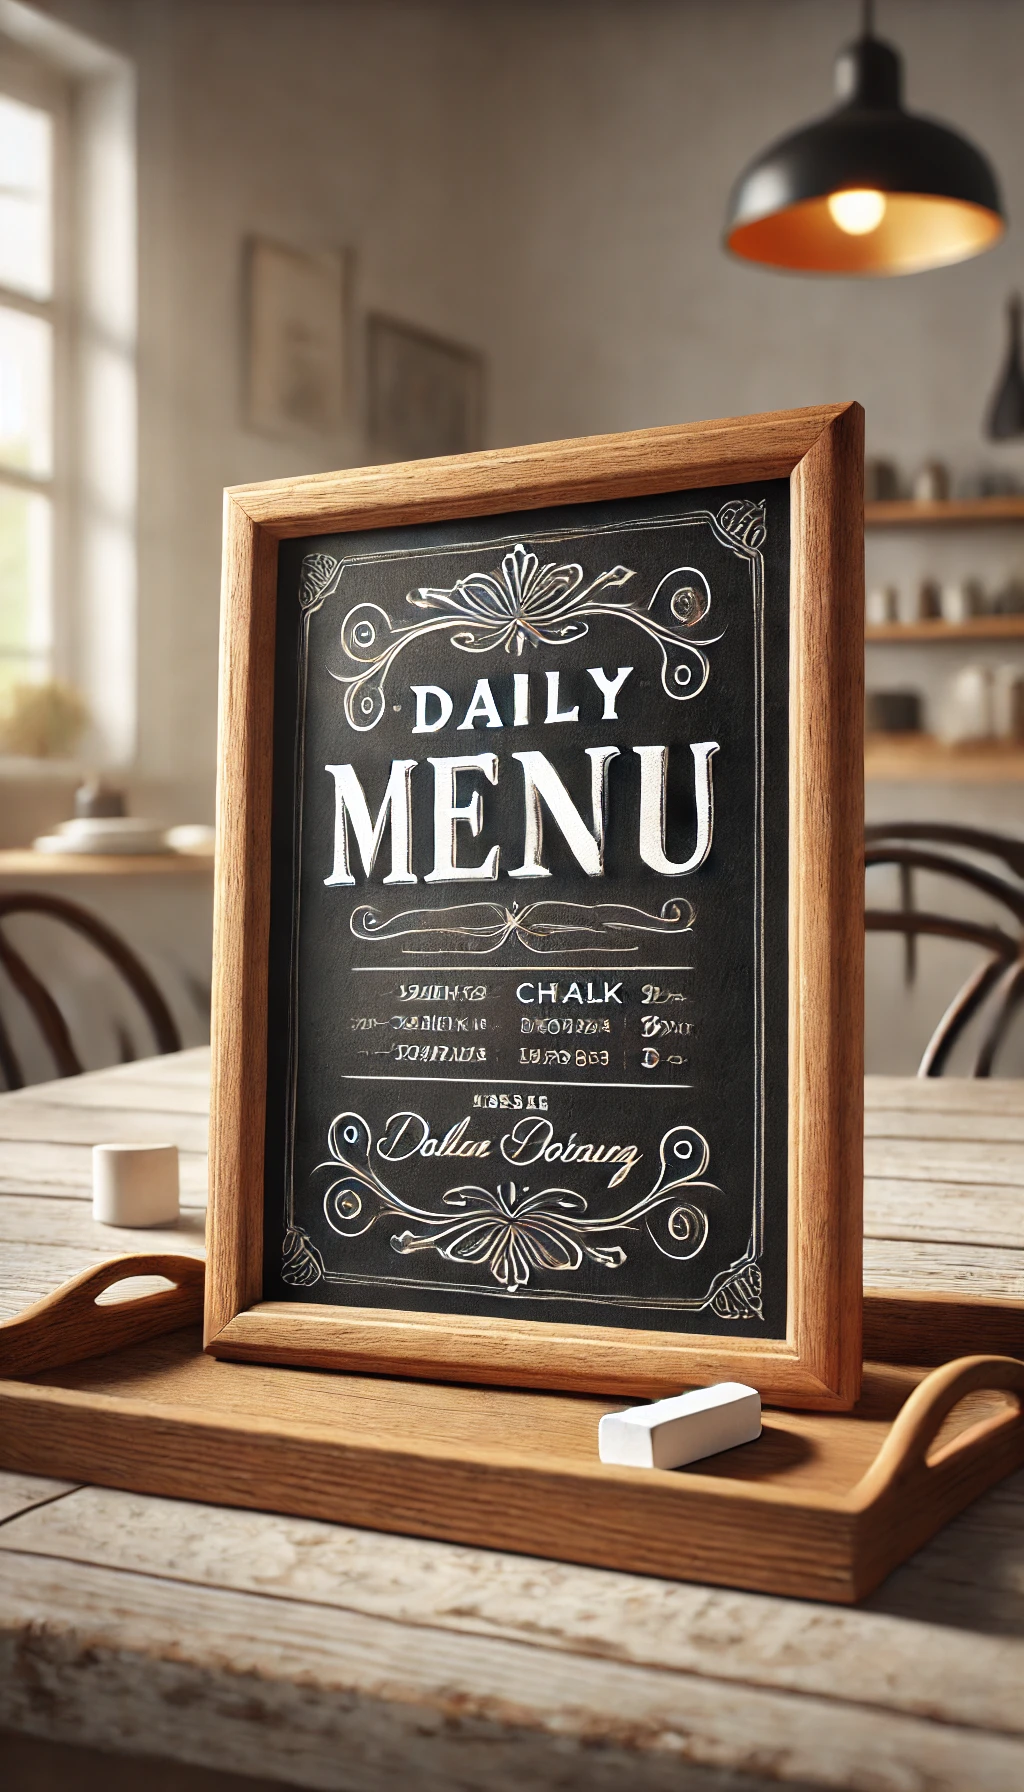
A chalkboard surface provides a versatile and interactive element to your kitchen decor. Purchase a pre-made chalkboard or create one by painting a piece of plywood or existing wall space with chalkboard paint. This surface can serve as a menu board, displaying weekly meals, or a message board for family reminders and notes. For a more sophisticated appearance, frame the chalkboard with a decorative molding. Enhance its functionality by attaching small baskets or shelves to hold chalk, erasers, and other accessories. Incorporate seasonal decorations by drawing themed images or quotes. For instance, during the autumn season, depict pumpkins and leaves. During the winter, illustrate snowflakes and festive greetings. Personalize your kitchen’s ambiance by frequently updating the chalkboard with new messages and artwork, fostering a dynamic and engaging environment.
A personalized chalkboard menu or message board isn’t just a surface for writing; it’s a dynamic element that integrates communication, organization, and artistic expression into your kitchen’s daily life. We’ll explore how to craft a board that’s both aesthetically pleasing and highly practical.
1. Material Selection and Preparation:
- Chalkboard Surface Options:
- Pre-made Chalkboards: These offer convenience and a polished look. Opt for magnetic chalkboards for added functionality, allowing you to attach notes, photos, or recipes.
- Chalkboard Paint: This allows for customization of size and shape. Consider painting an entire wall section or a large piece of plywood. For a smoother finish, apply multiple thin coats, allowing each to dry thoroughly.
- Chalkboard Contact Paper: This provides a temporary and easily removable option, ideal for renters or those who prefer flexibility.
- Framing and Mounting:
- Decorative Molding: Select molding that complements your kitchen’s style, whether it’s modern, rustic, or traditional. Miter the corners for a professional finish.
- Reclaimed Wood: For a rustic aesthetic, use reclaimed wood planks to create a unique frame. Sand and stain the wood to enhance its natural beauty.
- Secure Mounting: Use heavy-duty picture hangers or wall anchors to ensure the board is securely mounted. Consider the weight of the board and the wall’s material.
- Surface Preparation:
- Seasoning the Chalkboard: Before using the board, “season” it by rubbing the side of a piece of chalk over the entire surface and then erasing it. This creates a smoother writing surface and prevents “ghosting.”
2. Design and Customization:
- Layout and Organization:
- Menu Planning: Divide the board into sections for daily or weekly menus. Use decorative tape or stencils to create clear divisions.
- Message Board Organization: Allocate space for different types of messages, such as reminders, grocery lists, or inspirational quotes.
- Calendar Integration: Incorporate a monthly or weekly calendar section for scheduling appointments and events.
- Artistic Enhancements:
- Calligraphy and Lettering: Practice different lettering styles to create visually appealing headings and messages.
- Illustrations and Doodles: Add whimsical illustrations or doodles to enhance the board’s visual appeal. Consider seasonal themes or food-related imagery.
- Stencils and Templates: Use stencils or templates to create intricate designs or consistent lettering.
- Functional Additions:
- Magnetic Strips: Attach magnetic strips to the board’s surface to hold notes, recipes, or photos.
- Storage Baskets or Shelves: Attach small baskets or shelves to the board’s frame to hold chalk, erasers, and other accessories.
- Hooks and Clips: Add hooks or clips to hold recipe cards, aprons, or kitchen towels.
3. Utilization and Maintenance:
- Interactive Features:
- Family Collaboration: Encourage family members to contribute to the menu planning or message board.
- Recipe Sharing: Use the board to share favorite recipes or cooking tips.
- Inspirational Quotes: Display inspirational quotes or affirmations to create a positive atmosphere.
- Maintenance and Care:
- Regular Cleaning: Erase the board regularly to prevent chalk buildup. Use a damp cloth or chalkboard eraser for cleaning.
- Chalk Selection: Use high-quality chalk or chalk markers for clear and vibrant writing.
- Surface Protection: Avoid using harsh chemicals or abrasive cleaners on the chalkboard surface.
- Seasonal Updates: Change the design and messages on the board to reflect seasonal themes or holidays.
By implementing these detailed strategies, you can create a personalized chalkboard menu or message board that serves as a functional and visually appealing centerpiece in your kitchen. This dynamic element will enhance communication, organization, and artistic expression, transforming your kitchen into a vibrant and engaging space.
3. Design a DIY Herb Garden for Fresh Flavor and Visual Appeal
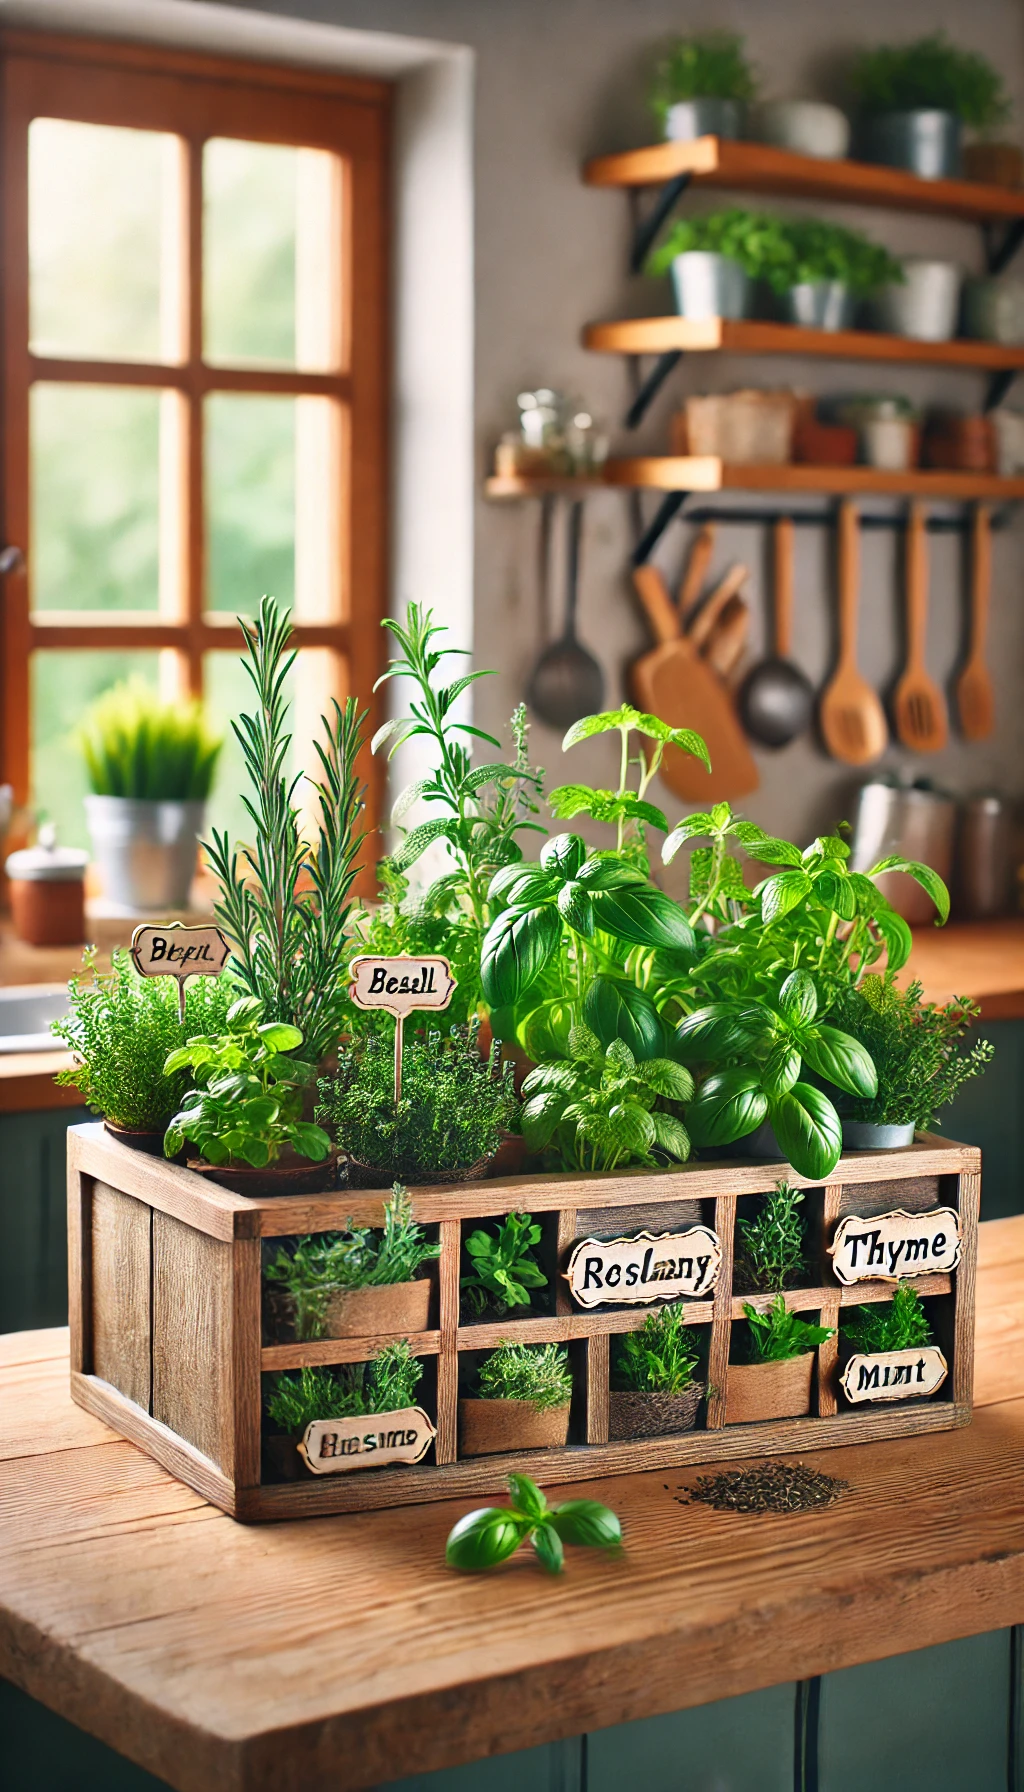
Cultivating a small herb garden within your kitchen offers a dual benefit: fresh, flavorful ingredients and a vibrant, natural aesthetic. Select a suitable location, such as a sunny windowsill or countertop, and choose herbs that thrive indoors, such as basil, mint, parsley, and chives. Utilize terracotta pots, ceramic planters, or even repurposed tin cans to house your herbs. For a more organized approach, create a vertical herb garden using a tiered shelf or hanging planter. Ensure proper drainage by placing gravel or pebbles at the bottom of each container. Label each herb with a small tag or stake. Infuse your kitchen with fresh aromas and natural beauty by strategically positioning your herb garden near the cooking area, providing easy access to fresh ingredients.
An indoor herb garden is more than just a source of fresh ingredients; it’s a living, breathing element that adds vitality and aroma to your kitchen. We’ll explore how to create a garden that’s both productive and aesthetically captivating.
1. Location and Environmental Considerations:
- Sunlight Optimization:
- South-facing windows offer the most consistent sunlight, ideal for most herbs.
- East or west-facing windows can also work, but rotate plants regularly for even exposure.
- Supplement natural light with grow lights if necessary, especially during winter months. LED grow lights are energy-efficient and provide optimal spectrums.
- Temperature and Humidity:
- Most herbs prefer temperatures between 60°F and 75°F (15°C and 24°C).
- Maintain moderate humidity levels by misting plants regularly or using a humidifier.
- Avoid placing herbs near drafty windows or heating vents.
- Space Assessment:
- Consider the available space on windowsills, countertops, or walls.
- Vertical herb gardens are ideal for maximizing limited space.
- Ensure adequate ventilation to prevent mold growth.
2. Container Selection and Soil Preparation:
- Container Diversity:
- Terracotta pots provide excellent drainage and a classic aesthetic.
- Ceramic pots offer a wider range of colors and designs.
- Repurposed containers, such as tin cans or mason jars, add a rustic charm.
- Self-watering planters simplify maintenance and prevent overwatering.
- Drainage and Aeration:
- Ensure all containers have drainage holes to prevent waterlogging.
- Place a layer of gravel or pebbles at the bottom of each container to improve drainage.
- Use a well-draining potting mix specifically formulated for herbs.
- Add perlite or vermiculite to the soil to enhance aeration.
- Soil Amendments:
- Incorporate compost or aged manure to enrich the soil with nutrients.
- Use a balanced organic fertilizer to promote healthy growth.
- Test the soil pH and adjust as needed to ensure optimal nutrient absorption.
3. Herb Selection and Planting:
- Herb Compatibility:
- Group herbs with similar growing requirements together.
- Consider the mature size of each herb when spacing them in containers.
- Avoid planting aggressive herbs, such as mint, in the same container as other herbs.
- Planting Techniques:
- Start with seedlings or cuttings for faster growth.
- Sow seeds directly into containers, following the recommended planting depth.
- Water thoroughly after planting and keep the soil consistently moist.
- Mulch the soil surface to retain moisture and suppress weeds.
- Herb Variety:
- Essential herbs: Basil, mint, chives, parsley, rosemary, thyme, oregano.
- Unique Herbs: Lemon balm, sage, cilantro, dill, lavender.
- Microgreens: Rapidly growing and full of nutrients, microgreens are an excellent addition to any indoor herb garden.
4. Design and Visual Enhancement:
- Vertical Gardening Systems:
- Utilize wall-mounted planters, tiered shelves, or hanging baskets to create vertical herb gardens.
- Consider using a living wall system for a dramatic and visually appealing display.
- Arrange herbs in a visually pleasing pattern, considering their color and texture.
- Labeling and Organization:
- Use decorative plant markers or labels to identify each herb.
- Organize herbs by type or frequency of use.
- Create a visually appealing display by arranging herbs in a cohesive manner.
- Decorative Elements:
- Incorporate decorative stones, pebbles, or moss to enhance the visual appeal of the garden.
- Add small figurines or garden ornaments for a whimsical touch.
- Use colorful containers or planters to complement your kitchen’s decor.
- Aromatic Placement:
- Place aromatic herbs like mint and rosemary near areas where you frequently spend time.
- Consider the placement of herbs in relation to your cooking area for easy access.
5. Maintenance and Harvesting:
- Watering and Feeding:
- Water herbs regularly, allowing the soil to dry slightly between waterings.
- Fertilize herbs every two to four weeks with a diluted liquid fertilizer.
- Monitor plants for signs of pests or diseases.
- Pruning and Harvesting:
- Prune herbs regularly to encourage bushier growth.
- Harvest herbs by snipping off the top leaves or stems.
- Avoid harvesting more than one-third of the plant at a time.
- Harvest in the morning, when the essential oils are most concentrated.
By implementing these detailed strategies, you can create a thriving and visually stunning indoor herb garden that enhances your kitchen’s functionality and aesthetic appeal. This living element will provide fresh flavors and aromas, creating a vibrant and engaging culinary space.
4. Craft Custom Kitchen Towel Displays for Functional Decor

Kitchen towels, often overlooked as purely functional items, can serve as decorative accents. Invest in a set of high-quality kitchen towels in coordinating colors or patterns. Create a custom towel display using a vintage ladder, a repurposed wooden crate, or a decorative towel bar. Fold the towels neatly and arrange them in a visually appealing manner. Incorporate seasonal towels to reflect the current time of year. For instance, utilize towels with floral patterns during spring and summer, and towels with warm, autumnal colors during fall. Consider adding small embellishments, such as ribbon or lace, to enhance the visual appeal of the towel display. Elevate your kitchen’s aesthetic by transforming everyday kitchen towels into eye-catching decorative elements.
Kitchen towels, often relegated to mere utility, possess untapped potential as decorative accents. We’ll explore how to create custom displays that elevate their role, seamlessly blending function with style.
1. Towel Selection and Preparation:
- Fabric and Texture Diversity:
- Beyond standard cotton, explore linen, microfiber, or waffle weave towels for varied textures and visual interest.
- Consider hand-loomed or artisan-crafted towels for unique patterns and craftsmanship.
- Select towels with varying weights and thicknesses for different purposes and visual depth.
- Color and Pattern Coordination:
- Establish a color palette that complements your kitchen’s decor.
- Mix and match solid colors, patterns, and textures for a layered and dynamic display.
- Consider seasonal towel sets to reflect changing aesthetics throughout the year.
- Embellishment and Personalization:
- Add embroidered monograms or designs for a personalized touch.
- Attach decorative buttons, lace, or ribbon to enhance visual appeal.
- Consider using fabric paint or stencils to create custom patterns or motifs.
- Prewash all towels to prevent shrinking.
2. Display Structure and Design:
- Repurposed and Upcycled Displays:
- Vintage Ladders: Sand and refinish a vintage ladder to create a rustic towel display. Lean it against a wall or suspend it from the ceiling.
- Wooden Crates: Repurpose wooden crates to create tiered towel displays. Stack them on countertops or mount them on walls.
- Picture Frames: Remove the glass from picture frames and attach towel bars or hooks to create framed towel displays.
- Old Drawers: Clean and refinish old drawers, and attach them to a wall.
- Custom-Built Displays:
- Floating Shelves with Towel Bars: Install floating shelves with integrated towel bars for a sleek and modern look.
- Pegboards: Utilize pegboards to create customizable towel displays. Arrange pegs and hooks to accommodate various towel sizes and styles.
- Wall-Mounted Racks: Design and build custom wall-mounted racks with multiple tiers or compartments for organized towel storage.
- Display Arrangement and Composition:
- Fold towels neatly and consistently for a polished appearance.
- Arrange towels in a visually appealing pattern, considering color, texture, and size.
- Create focal points by strategically placing embellished or patterned towels.
- Consider using S hooks to hang towels from rods.
3. Functional Integration and Accessibility:
- Strategic Placement:
- Position towel displays near sinks, dishwashers, or cooking areas for easy access.
- Consider creating multiple towel displays in different areas of the kitchen for convenience.
- Place heavier towels where they are most used.
- Towel Variety and Purpose:
- Designate specific towels for different tasks, such as drying dishes, wiping countertops, or handling hot items.
- Keep frequently used towels within easy reach.
- Consider having a display of decorative hand towels for guests.
- Maintenance and Organization:
- Establish a system for regularly rotating and laundering towels.
- Keep extra towels neatly stored within the display or nearby drawers.
- Regularly clean and maintain the display structure to prevent dust and grime buildup.
4. Aesthetic Enhancement and Decorative Accents:
- Seasonal and Themed Displays:
- Create seasonal towel displays to reflect holidays or changing aesthetics.
- Incorporate themed towels with patterns or motifs that complement your kitchen’s style.
- Change the display monthly, or weekly.
- Decorative Embellishments:
- Add small decorative items, such as vases, candles, or figurines, to the towel display.
- Incorporate natural elements, such as dried flowers or greenery, for a touch of organic beauty.
- Use decorative hooks or clips to enhance the visual appeal of the display.
- Lighting and Shadow Play:
- Position towel displays near windows or under lighting fixtures to create interesting shadows and highlights.
- Consider using accent lighting to illuminate the display and enhance its visual impact.
By implementing these detailed strategies, you can transform ordinary kitchen towels into extraordinary decorative elements, enhancing your kitchen’s functionality and aesthetic appeal. These custom displays will add a touch of personality and style, creating a welcoming and visually engaging culinary space.
5. Enhance Lighting with DIY Pendant Lights or String Lights
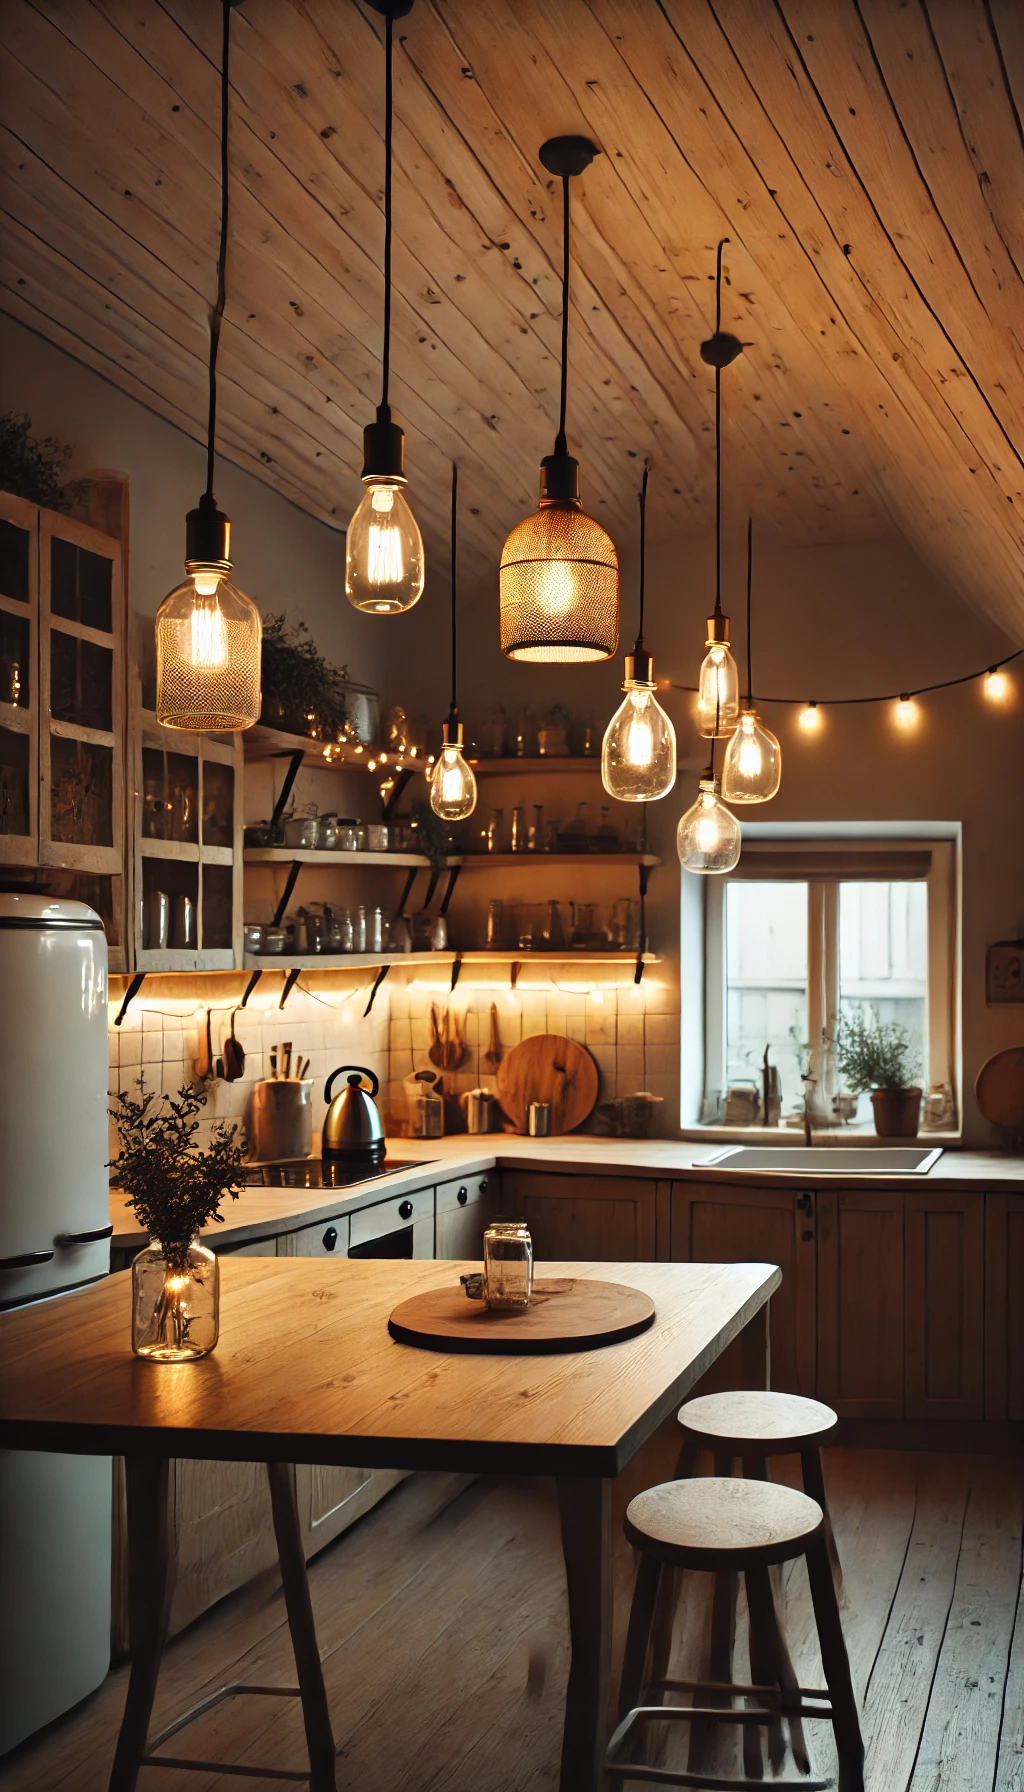
Lighting plays a crucial role in setting the ambiance of any space. Replace outdated or generic light fixtures with DIY pendant lights or string lights. For pendant lights, repurpose glass jars, metal colanders, or vintage lampshades. Suspend them from the ceiling using pendant light kits or chains. For string lights, drape them along the top of cabinets, around windows, or across open shelving. Consider using warm white LED bulbs for a soft, inviting glow. For a more dramatic effect, utilize colored bulbs or dimmable lights. Incorporate fairy lights within glass jars or bottles for a whimsical touch. Transform your kitchen’s atmosphere by strategically enhancing lighting, creating a warm and inviting space for cooking and gathering.
Let’s explore how to enhance your kitchen lighting with DIY pendant lights or string lights, transforming your space with customized illumination that creates ambiance and functionality.
Enhancing Lighting with DIY Pendant Lights or String Lights: A Detailed Guide
Lighting is a cornerstone of kitchen design, influencing mood, functionality, and visual appeal. We’ll explore how to create custom lighting solutions that add personality and warmth to your kitchen.
1. DIY Pendant Light Creation:
- Repurposed Container Selection:
- Glass Jars: Choose various sizes and shapes for a rustic or industrial look. Consider tinted or textured glass for added visual interest.
- Metal Colanders: Repurpose vintage colanders for a unique and functional light fixture. The perforated design creates interesting light patterns.
- Vintage Lampshades: Refurbish vintage lampshades by cleaning, painting, or reupholstering them.
- Woven Baskets: Baskets can create a warm, diffused light.
- Pendant Light Kit Assembly:
- Purchase pendant light kits with all necessary components, including sockets, cords, and canopies.
- Follow the manufacturer’s instructions carefully for safe assembly.
- Consider using cloth-covered cords for a vintage aesthetic.
- Installation and Placement:
- Ensure proper electrical connections and safety precautions. If unsure, consult a qualified electrician.
- Adjust pendant light heights to create a layered lighting effect.
- Position pendant lights above kitchen islands, dining tables, or workspaces for focused illumination.
- Use dimmable switches.
2. String Light Integration:
- String Light Selection:
- Choose LED string lights for energy efficiency and longevity.
- Select warm white bulbs for a cozy and inviting glow.
- Consider string lights with different bulb sizes and shapes for visual variety.
- Outdoor rated string lights are more durable.
- Creative Placement Techniques:
- Drape string lights along the top of cabinets to create a soft, ambient glow.
- Weave string lights through open shelving to highlight decorative items.
- Hang string lights around windows or doorways to frame the space.
- Run string lights along the bottom of upper cabinets to illuminate counter tops.
- Use string lights inside of glass cabinets.
- Decorative Enhancements:
- Incorporate fairy lights within glass jars or bottles for a whimsical touch.
- Attach decorative clips or pegs to secure string lights and create visual interest.
- Use colored string lights for special occasions.
3. Lighting Layering and Ambiance:
- Layered Lighting Approach:
- Combine ambient, task, and accent lighting for a well-balanced kitchen illumination.
- Use pendant lights for task lighting, string lights for ambient lighting, and under-cabinet lighting for accent lighting.
- Dimming and Control:
- Install dimmer switches to adjust lighting levels and create different moods.
- Consider using smart lighting systems for remote control and automation.
- Color Temperature Considerations:
- Select bulbs with a warm color temperature (2700K-3000K) for a cozy and inviting atmosphere.
- Use cooler color temperatures (3500K-4000K) for task lighting in workspaces.
4. Safety and Practicality:
- Electrical Safety:
- Turn off power at the circuit breaker before working on any electrical connections.
- Use properly rated wiring and connectors.
- Avoid overloading electrical circuits.
- Material Safety:
- Use heat-resistant materials for DIY light fixtures.
- Keep flammable materials away from light bulbs.
- Maintenance and Accessibility:
- Ensure easy access to light bulbs for replacement.
- Clean light fixtures regularly to maintain optimal illumination.
By implementing these detailed strategies, you can transform your kitchen lighting with DIY pendant lights or string lights, creating a customized and inviting space that reflects your personal style and enhances your culinary experience.
Conclusion
By implementing these five easy DIY kitchen decor ideas, you can significantly enhance the aesthetic appeal and functionality of your kitchen without incurring substantial costs. These projects offer a tangible way to personalize your space and create a welcoming environment for both family and guests.